Wednesday 19 December 2012

Working with Taxonomy and JavaScript in SharePoint 2013

SharePoint 2013 has introduced some nice new features, one of which is the ability to manipulate managed metadata with the JavaScript Object Model. Unlike SharePoint 2010, we can now do a variety of operations with the Taxonomy Items in SharePoint 2013. Unfortunately, at the time of this writing, there is not a lot of documentation available on MSDN with regards to this particular feature.There is some preliminary documentation available for the Taxonomy in .NET Managed Client Object Model but the JavaScript API Reference has not been updated yet. So hopefully this blog will come in handy for someone looking to explore. All right lets get started:

First and foremost, you will have to load the SP.Taxonomy.js on your page explicitly as it is not loaded by default in SharePoint. Also make sure that you have loaded the SP.Runtime.js and SP.js files before continuing with your taxonomy code. Various errors like "SP.Taxonomy is not defined" or "Unable to get property 'TaxonomySession' of undefined or null reference" might come up if you have not loaded all the 3 necessary files on your page.

A simple way to load all the 3 files is with the jQuery.getScript function:


Now lets see some actual code which you can use to Manipulate the Taxonomy Items:

1) Query a particular Term Set and get all the Terms under it:


2) Create new Term Group under the Term Store:


3) Create new Term Set under a Term Group:


4) Create new Term under a Term Set:


5) Get Value of a Single Value Taxonomy Column in a List:


6) Get Values of a Multi Value Taxonomy Column in a List:


Hopefully you found this helpful. Happy SharePointing!

Saturday 3 November 2012

Querying List Items from Large Number of Sites in SharePoint


When scouting the web for working with SharePoint Large Lists, you can find many articles which deal with fetching a huge number of items from one particular list. But very little data when you want to fetch items from a large number of sub sites. So after a little bit of poking around, I decided to blog about some of my findings here:

The Scenario:

Here are the conditions on which I was testing:
  • 1 Site Collection
  •  500 Sub sites
  •  1 Task List in Each sub site - > 500 Lists
  •  10 items in each List -> 5000 List Items

 So the total count of items I had to query was about 5000 and according to the test conditions, the items which would match the query were not more than 1200 at a time.

The Tools:

The tools I was using for measuring the performance were nothing extraordinary:

1)  I was using the StopWatch Class from the System.Diagnostics namespace. This class provides a fairly simple and easy mechanism for recording the time a particular operation took to execute.
This MSDN link has excellent examples on how to use the StopWatch class for performance measuring

2) The Developer Dashboard has always been my goto tool for performance measuring. I don’t know how I used to get by before I started using it. It provides a wealth of information about the page load. It can provide you with the time taken, the database calls made, the stack trace and a whole lot of other very useful information. A good tutorial on the Developer Dashboard can be found here.

SPSiteDataQuery:

The SPSiteDataQuery class is the heart of architecture when you want to get data from multiple sites. This class by itself does not use any form of caching and always returns data based on the real time queries. So even if it takes a bit longer to fetch the data, it is guaranteed that you will get all the current results and your users will never have to wait to see their new items to be returned by the query.

Here is the code for doing a simple query with the SPSiteDataQuery class:


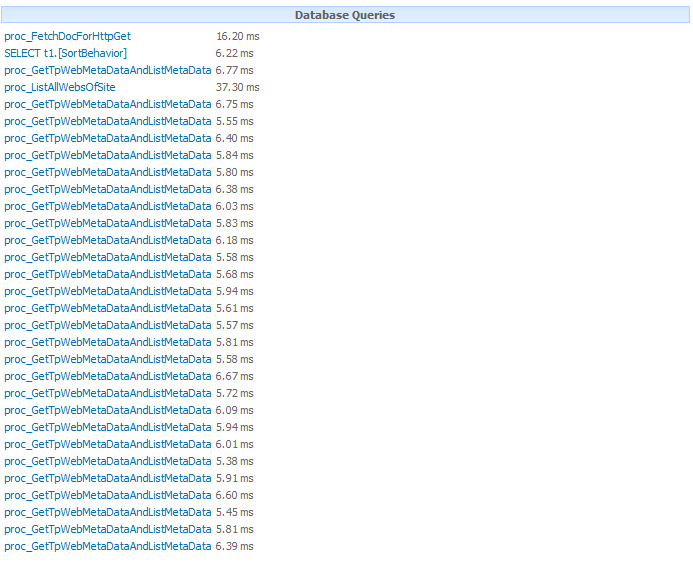
Here is a stack trace of the internal methods which are called by the SharePoint framework when a SPSiteDataQuery is used:


So as you can see, it calls the SPRequest.CrossListQuery method which internally makes queries to the Database to fetch the relevant results.

When querying the database the procedure proc_EnumListsWithMetadata is used. You can have a look at this procedure in your Content DB. It queries several tables such as the dbo.AllLists, dbo.AllWebs etc. to fetch the relevant results.

Time taken to query 5000 items in 500 sub sites and return 1200 matching items:

 650ms average on each load.

CrossListQueryInfo:

The CrossListQueryInfo class is another mechanism you can use to fetch the List Items from multiple sites. This class internally uses the SPSiteDataQuery class to actually fetch the items from the database and when the items are returned, it stores them in the object cache of the Publishing Infrastructure. When any more calls to the same data are made subsequently, then the data is returned from the cache itself without making any more trips to the database.

The working of the CrossListQueryInfo class largely depends on the object cache of the Publishing Features of SharePoint server. So you cannot use this class in SharePoint 2010 Foundation or in sandbox solutions. Also, the default expiry time of the object cache is set to 60 seconds. So you might want to change that time depending upon your environment requirements.

Here is the same code for using the CrossListQueryInfo class:


Make sure to set the CrossListQueryInfo.UseCache as true if you want to use the caching features. Another very important thing to mention is that there are 4 overloads of the CrossListQueryCache.GetSiteData method and only 2 of them support caching.
So only use the methods which accepts the SPSite object as one of the parameters if you want to use caching in your code.
The Stack Trace of the CrossListQueryInfo class looks like this:


So as you can see, the Publishing.CachedArea is queried first to check whether the items exist in the cache. If they don’t exist, then a call to the SPSiteDataQuery is made which fetches the values from the database and stores it in the cache. All the next subsequent calls will find that the items are present in the cache so no more calls with the SPSiteDataQuery class will be made.

As a result, the very first call will take longer than a vanilla SPSiteDataQuery call as under the hood, the CrossListQueryInfo is not only fetching the items but also building a cache with them.

Time taken to query 5000 items in 500 sub sites and return 1200 matching items:
 2000ms on first load and 30ms average on each subsequent load until the object cache expires.

PortalSiteMapProvider:

The PortalSiteMapProvider is a class which can used to generate the navigation on SharePoint Publishing sites. The Global navigation, the Quick Launch and the Breadcrumb navigation can all be generated with help of the PortalSiteMapProvider. It also provides methods to query sub sites, lists and list items with help of caching.

The main advantage of the PSMP is that it queries the SharePoint change log to check whether any changes have happened to the data being queried. If yes, then only the incremental changes are fetched and thus the cache is updated accordingly.

However, my tests showed that the PortalSiteMapProvider.GetCachedSiteDataQuery method which is used to get items from multiple sub sites does not maintain an incremental cache and it only fetches the new or updated items when the object cache has expired.

So essentially when querying for items from multiple sites, the CrossListQueryInfo and the PortalSiteMapProvider behave almost similarly.

Here is the sample code for the PortalSiteMapProvider:


The stack trace for the PortalSiteMapProvider:


You can see that it’s very similar to the CrossListQueryInfo.

Time taken to query 5000 items and return 1200 matching items:
 2000ms on first load and 30ms average on each subsequent load until the object cache expires


So these are some of the methods you can use to query multiple List Items in multiple sites. Hope you had a good time reading through the post. 

Happy SharePointing!


SharePoint List Indexes : Under the Hood


You must be already aware that SharePoint provides the functionality to index columns so querying on them will be faster and that Throttling will not occur. Let us look at how SharePoint maintains this index and how exactly is it stored in the Content Database.

SharePoint maintains multiple tables in the content database with names starting with dbo.NameValuePair and followed by Culture Names where the Site ID, Web ID, List Id, Item ID and Value of the Indexed fields are stored.

If the value of the field is not Culture Dependent, e.g. the DateTime Fields, the Person or Group Fields etc. then the Value is stored in the table named dbo.NameValuePair.

If the value of the field is Culture Dependent e.g. the Text fields, then the value is stored in a table named dbo.NameValuePair_and followed by Culture Name. E.g. If the current language being used is English, then the value is stored in the table called dbo.NameValuePair_Latin1_General_CI_AS.

When a query is made to any of the lists which has an indexed field, then a JOIN is performed on the dbo.AllLists table and the relevant dbo.NameValuePair table and the joined data is presented.

Since the data in the indexed fields is stored completely in a different table, list throttling does not occur even if the query is made to more than 5000 rows for a normal user.

To test this out, I created a brand new WebApplication and new root level site collection under that with the Team Site template. After that, I created an index in my “Tasks” list on the Assigned To field which is a Person or Group field and added a sample task to the list. Then I opened the Content Database of the new WebApplication and had a look at the dbo.NameValuePair table:


The row which is highlighted with red contains the SiteId, WebId, ListId, ItemID and the value which I entered in the Assigned To field of my Tasks List. It is showing as 9 because it is a Person field and that is the ID of the User I assigned the Task to.

The 2 rows below the highlighted rows are the values of the Modified field from the “Site Pages” list. The values belong to the Home.aspx and the How To Use This Library.aspx as these 2 items are created by default in a Team Site.  This field is added to the Index by default and since it is a field of type Date and Time (which is not culture dependent) we can see it in the dbo.NameValuePair table.

After that I opened the dbo.NameValuePair_Latin1_General_CI_AS table and had a look in there:

So just like we saw earlier, all the data related to the Title field and its value (which is culture dependent) is stored in this table.

Composite Indexes:


SharePoint also allows composite indexes to be created on a list. However there are limitations on which type of columns can be included as the Primary and the Secondary Columns in the composite index.

If the Primary Column in a composite index is selected as column whose value is stored in the dbo.NameValuePair table, then the secondary column must also be selected which will be stored in the same table. So in short, if the primary column is language independent, then the secondary column in the index should also be language independent.

If the primary column in the list is language dependent, then you cannot specify a secondary column in the composite index.

Hope you had fun knowing more about indexes! Happy SharePointing!

Monday 22 October 2012

The SPWebCollection.WebsInfo property

Recently, while browsing some MSDN docs, I came across the WebsInfo property of the SPWebCollection class. This property is a collection of the SPWebInfo class which contains metadata about each web in the given web collection.

Methods and properties such as SPWeb.GetSubWebsForCurrentUser,  SPSite.AllWebs and SPWeb.Webs, all return an object of the SPWebCollection class and the WebsInfo property can be used as a wrapper on some basic information about each web.

The properties available in the WebInfo class are:
  1.  Configuration
  2. CustomMasterUrl
  3. Description
  4. Id
  5. Language
  6. LastItemModifiedDate
  7. MasterUrl .
  8. ServerRelativeUrl
  9. Title
  10. UIVersion
  11. UIVersionConfigurationEnabled
  12. WebTemplateId
So when working with the returned collection of webs, if you refer to any of the above mentioned properties, then there is no further need to open an expensive SPWeb object of that web. The value of the property is simply returned from the SPWebInfo object. Here is some code which demonstrates how to use the WebsInfo property.

Now here is where it gets interesting. After deploying the above code, I switched on my Developer Dashboard to confirm that referring to any of the properties is indeed as non-expensive as claimed. And here is what my Developer Dashboard had to say regarding the call:


So only 1 database query was made with the procedure proc_ListAllWebsOfSite. After opening this procedure in the Content Database, it contained this piece of code:


In fact, if you want to refer to any of these properties directly from the SPWeb objects of the returned webs, then also no additional call will be made to the database to fetch the properties. Here is the code to demonstrate that:


As far as you access only these properties from the SPWeb object, there will be no need to make any more calls to the database.

Now, If you want to refer to any of the other properties of the SPWeb object, things are going to get expensive. For example, if you want to refer to the SPWeb.SiteLogoUrl property, you will get the following result in the Developer Dashboard:


So as you can see SharePoint has to call the proc_GetTpWebMetaDataAndListMetaData procedure for each SPWeb object in order to return the SiteLogoUrl property.

If you use reflector or ILSpy and open the SPWeb Class in the Microsoft.SharePoint.dll , you will see that there are 2 internal methods called InitWeb( ) and InitWebPublic( ) which are responsible for initializing most of the properties of the SPWeb object. These methods in turn call the SPWeb.Request.OpenWebInternal( ) method which actually does the job of calling unmanaged code to open the expensive SPWeb object.

This was indeed a valuable learning for me as it would hugely impact the performance of my code. I hope it was a good learning for you too!

Tuesday 16 October 2012

PowerShell Scripts for SharePoint 2010

I was working with Large Lists recently and needed to create huge amount of test data. I had to work with about 2,000 Sub Sites, 2,000 Lists, 6,000 documents and about 20,000 list items. So naturally the all so powerful PowerShell was the only answer for creating such an amount of test data with so much flexibility and ease of use. So I thought to write down here some of my scripts which someone might find useful:

1) Index Fields:


2) Delete Site:


3) Upload Document:


4)Add New Group to Site:


5) Create New Site:


6) Add User to Site:


7) Clear Object Cache on All Web Front Ends


8) Enable the Developer Dashboard


Hope you find them useful!

Monday 15 October 2012

Caching Options in SharePoint 2010

So recently we had to look up options for caching data in our project and I took the responsibility of doing some research on the various options available for caching in SharePoint 2010. The basic motive behind implementing caching was to reduce the calls to the database and hence improve the performance.
Here are some of my findings:

1) BLOB Cache


Binary Large Object cache or BLOB cache is a disk based cache in SharePoint. This means that the data is stored on the Hard-Disk of the Web Front End Server.
Initially for the first call, data is fetched from the database and stored on the WFE. Any further calls to the same data are responded with the cached version hence avoiding a call to the database.

It can be used to store data in a variety of format including images, audio, video etc. Furthermore, you can configure it to store files based on extension types to suite your environment. (Eg: jpg, js, css etc)

The BLOB cache is turned off by default. You will have to enable it from the web.config file of your web application if you want to use it.

To enable it, open the relevant web.config file and find the following line:

<BlobCache location="C:\blobCache" path="\.(gif|jpg|png|css|js)$" maxSize="10" enabled="false"/>

change that line to:

<BlobCache location="C:\blobCache" path="\.(gif|jpg|png|css|js)$" maxSize="10" max-age="86400" enabled="true" />

a. location is the location on the hard disk where your cache will be stored.
b. path is the regular expression used to determine the type of data to be stored
c. maxSize is the size in GB of the cache
d. max-age specifies the maximum amount of time (in seconds) that the client browser caches files. If the downloaded items have not expired since the last download, the same items are not requested again when the page is requested. The max-age attribute is set by default to 86400 seconds (that is, 24 hours), but it can be set to a time period of 0 or greater.
e. enabled turns the caching on if true and turns it off if false.

2) Page Output Cache


SharePoint also uses ASP.NET output cache to store page output. This requires the publishing features to be enabled on the Site Collection and hence it is only available in SharePoint Server 2010 and not SharePoint Foundation. This cache is stored in the Memory of the Web Front End and hence is reset when the application pool recycles.

SharePoint supports something called as cache profiles in the output cache. This means that different profiles of the page are created for groups with different levels of access to the page. The page is rendered initially when the first request is made and cached. Now if another user with the same access rights loads the page, then it is served from the cache. This is done for each group with different set of permissions. Find more information about the Page output cache here.

3) Object Cache


Object Cache can be said as the most popular of the SharePoint caches. It is a Memory based cache. This means that the data is stored in the RAM of the Web Front End Server. As a result of this, this cache is reset if the application pool of the web app is recycled.

The publishing features of a Site Collection need to be enabled for this cache to become available. And due to this, it is available only in SharePoint Server 2010 and not SharePoint 2010 Foundation.

A variety of functionality in SharePoint 2010 uses the object cache internally. Mostly it is used to store data retrieved from Cross List Queries. Classes such as the PortalSiteMapProvider and CrossQueryListIfo use the object cache internally to store information returned. Other elements of SharePoint such as the Content Query WebPart and the Navigation also use the object cache for storing retrieved data.

Once the Publishing Features are enabled, you can configure the object cache from Site Actions-> Site Settings -> Site Collection Object Cache.

The default size of the object cache is set to 100 MB and the expiry time is set to 60 Seconds. You can adjust these values to suite your environment after careful consideration and testing. Ideally it should not be kept under 3 MB otherwise it will start affecting the performance.

4) Web Storage of the Browser


And last but not the least, we have the Web Storage of the Browser itself. This is not a SharePoint specific cache but it can be used effectively with SharePoint none the less. It contains about 10 MB of space allocated on the Client Side. So even the request to the Web Front End does not have to be made as the data is already present on the client side. Some JavaScript plugins like jStorage wrap around the Web Storage and provide an excellent interface to access it. Find more about the Web Storage here.


Tuesday 28 August 2012

Show Special Characters in XSLT WebParts.

Are you are working with XSLT WebParts (eg: People Search Core Results WebPart) and the special characters like Ã¤, ë, é, ö, etc are getting replaced with a question mark (?) or a Square Box ? Let's change that then:

So basically the encoding of the XSLT is set to "iso-8859-1" by default and we will have to change it to "utf-8." Here is how to change the encoding: Find in your XSL file, the following line:
and change it to:
Now all the special characters should be visible perfectly.

Monday 27 August 2012

Paging in SharePoint JavaScript Client Object Model

Paging can be of great help when you want to improve the performance of your code especially when you are working on front-end development and want to reduce the page response time. Let us see how can be implement paging when working with the JavaScript Client Object Model.


The important parts to note in this code are the RowLimit element in the CAML query and the SP.ListItemCollection.get_listItemCollectionPosition(); property. Please have a look at the comments to know more details about the individual lines of code.

The ListItemCollectionPosition.pagingInfo determines the id of the last item fetched along with the filter and sorting criteria. It specifies information, as name-value pairs, required to get the next page of data for a list view.

Tuesday 21 August 2012

RegisterClientScriptBlock for SharePoint Sandbox Solutions

So we had this requirement where we had to check if a script was already loaded on the page before we push it. So my natural choice was to use the RegisterClientScriptBlock method. But this being a Sandbox solution, like always, things were much more difficult than they initially appeared.

The code executed without throwing any error so I thought I was good to go but the script was not getting registered and also the IsClientScriptBlockRegistered method was not doing its job. So after some searching around, I found the following page which explained my scenario:
http://blog.a-dahl.dk/post/Sharepointe28093Where-is-my-Page-object.aspx

So turns out that sandbox solutions runs in a "sandbox" mode with separate context and no access to the rest of the page. So to my huge disappointment, the ClientScriptManager class was out of bounds. Now it was up to me to figure out a workaround for this issue.

So I thought, why not push some good old JavaScript to the page to check the loading of the script? The challenge before me was that since I was pushing the script from server side to the page, the code would be executed before my DOM was loaded. Also, I could not use any jQuery here because it was included in my script which was to be checked and  loaded. So 1) I had to make sure that my code would get executed only after the page was loaded and  2) I had to do it using pure JavaScript.

The first problem could have been solved by using window.load = function( ) {} but due to the function's browser incompatibility, I decided against it. Thankfully, SharePoint provides an Out of the Box mechanism called _spBodyOnLoadFunctionNames in which we can push functions to be executed when the body tag of the document completes loading.
Being using jQuery very heavily in the past, using pure JavaScript was also an exciting challenge which was fun to do. So after about an hour of fiddling with this issue, I managed to put together a function which would check if a script with the particular id was loaded and if not, then only load it on the page. Here is my SandboxRegisterClientScriptBlock function:

Wednesday 13 June 2012

Use pure html pages (instead of .aspx) in SharePoint 2010

So I was working on one of my unit testing projects which displayed the results in a plain old .html page. When integrating it with SharePoint 2010,  I realized that I could not navigate to .html pages. When I entered the URL of a html page, the browser asked me whether I wanted to download the html file instead of displaying it in the browser.

After some digging around I came across this very informative post:
http://social.technet.microsoft.com/wiki/contents/articles/8073.sharepoint-2010-browser-file-handling-deep-dive.aspx

So basically there are two modes for file handling in SharePoint 2010. "Strict" and "Permissive". Strict mode entails that only the trusted filetypes in the web application are opened in the browser. For all the rest of the filetypes the response will include a "X-Download-Options: noopen" header. This header will basically instruct the browser not to open the file inline.
When the mode is Permissive, no such restriction will be placed on the files. If a file lives inside SharePoint, then it will be displayed inline by the browser.

You can create a hybrid approach by keeping the Browser file handling mode as "Strict" and using the
SPWebApplication.AllowedInlineDownloadedMimeTypes property of the web application to specify which file types are trusted in your web application.

By default the Browser File Handling property of the Web Application is set to "Strict". To change it to permissive, follow these steps:

Go to Central Administration > Manage Web Applications > [Highlight a web application] > click General Settings in the Ribbon > Scroll down in the General Settings window to see Browser File Handling. Set as desired. Save settings.

Note: The recommended option from Microsoft regarding Browser File Handling is "Strict"

(Quick and Dirty hack: You can keep the extension of a file as .aspx and include pure html inside it and SharePoint will run it even if the Browser File Handling is set to "Strict")

Wednesday 16 May 2012

SharePoint JavaScript Unit Testing with Jasmine


So recently while working on some code, I realized that I have not yet ventured into the field of Unit Tests and TDD. I had read about it plenty but never had got an opportunity to work on it. Test Driven Development (TDD) consists of writing the test cases before you write your code. It mainly consist of 3 factors: Red, Green and Refactor. Red indicates writing of a test case which will always fail, mainly because of the fact that the functionality for passing the test has not yet been written. Next, Green indicates the creation of the functionality which will pass the test. And finally, Refactor indicates the re-modelling of your code to make it more efficient and performance friendly.

Since I am writing a lot of JavaScript these days, I decided to go forward and introduce TDD into my JavaScript Projects. When I was looking for more information on JavaScript Unit Testing, the one framework which immediately grabbed my attention was Jasmine. It came with a terse and easy syntax and it clearly outmatched the other frameworks in functionality and ease of use. More over, it could be used completely client side in the browser as a standalone framework. So I decided to go forward and implement it. (You can try out Jasmine here without installing anything).

Now being a SharePoint developer, things are not always as easy as they seem. You will find a lot of tutorials on the web integrating Jasmine with various technologies but almost none when SharePoint comes into the picture. So like most of the times, it was on me to figure out how to integrate the Jasmine Unit Testing Framework with SharePoint JavaScript and create successful Unit Tests with it.

As I mentioned before, the good thing about Jasmine is that you can use it as standalone framework without making much configuration settings. It completely runs in the browser and presents a very rich and informative UI when it comes to indicating whether a test has passed or failed.

Integrating it with SharePoint:

Following is my SharePoint project structure. I have included all the files for the tests in the "Tests" module (As highlighted below)


Now, the Jasmine framework requires some basic JS and html files to run the tests and display the results. 

  1.  The jasmine.js file does all the heavy lifting.It contains the code of the testing framework.
  2.  The jasmine-html.js, jasmine.css and the SpecRunner.aspx page all work in the presentation layer and provide a nice rich UI to display the result of the tests. 
  3.  The maiFileSpec.js is the specrunner which will contain and run all the tests for the JavaScript functions.
  4.  The mainFile.js is a regular old JavaScript file which will  contain all of our code which has to be tested. This does not have to be a single file you can test functions in multiple JS files also.
Now lets get into some code. Here is the code for my mainFile.js which has the functions which we will be testing with the Jasmine Framework:

This file contains 3 functions. MakeInt converts a value to a integer with radix 10. Divide returns the first number divided by the second number. It throws an error is the second number is 0. CreateJQObject creates and returns a jQuery object with the the specified HTML tag, is and class.

Now lets have a loot at the mainFileSpec.js file, which we will be using to test the functions defined in the previous file.


Now lets aggregate all this code in one aspx page so that we can carry out the tests. Here is how my SpecRunner.aspx looks:


Now once we deploy this project to the SharePoint site, all we have to do is navigate to the SpecRunner.aspx page to where it is deployed and the tests will be automatically run:


Now lets, change some code so that the tests will fails and we will get to see how jasmine displays the failed tests UI. I am changing the following code in the Test for the CreateJQObject function:
expect(jqObject.length).toEqual(0);
This test will now fail because the length of the jQuery object will be 1 and the test expects it to be 0.

Also, lets change one more thing. The error thrown by the Divide function:
 expect(testErr).toThrow(new Error("Result will be Infinity because divisor is 0"));
This test will also fail because the test is expecting one error but the code will throw another kind of error.

Lets runs the tests and find out. After running the test, we are presented with the following UI:


So as you can see, if the test fails we are presented with the functions which are failing, their expected and actual values and the execution queue which caused the error.

So in conclusion, TDD can be very easily achieved in JavaScript with help of the Jasmine JavaScript Framework. Moreover, we can utilize the framework inside SharePoint as well!

Have fun coding!

Wednesday 4 April 2012

SharePoint List Designer in Visual Studio 11

I have recorded a ScreenCast describing one of the new Features of Visual Studio 11 that is the SharePoint List Designer:


Tuesday 3 April 2012

JavaScript XML Documentation in Visual Studio 2012

So I have been playing around with Visual Studio 2012 developer preview recently. From a SharePoint developers perspective, there are a lot of new features which will improve the productivity such as the List Designer, Remote Deployment of Solutions etc. Also, from a JavaScript developers perspective, there are a truck load of new features which make your life quite easy and productive. Visual Studio 2012 treats JavaScript as a first class citizen with functionality such as Intellisense and 'Go to function definition'.

One of the exciting features is the XML documentation comments functionality which allows the developer to provide XML comments to functions which the Intellisense picks up and displays accordingly. Also, more than one signature can be displayed for overloaded functions. Lets have a look at an example:


One quirky thing is that we have to put the documentation inside the function. The <signature> element describes the documentation for one implementation of the function. The <summaryelement describes the description of that implementation. The <param> element describes the details about one parameter of the function. The <returns> describes the type of the value which the function returns. And as you can see from the following image, the Intellisense does indeed pick it up and display the documentation accordingly.


Here is the complete list of elements supported by the  <signature> element:

Also, the XML documentation functionality goes beyond the signatures. Here is the complete documentation available right now:

Saturday 28 January 2012

Working with CoffeeScript on SharePoint : Interacting through jQuery

Now in this next part, lets see how CoffeeScript can be used with jQuery on SharePoint:
Lets start with the most nifty feature first:
$(document).ready(function () { 
    //Code here.
});
is now:
$ ->
    //Code here.  

CoffeeScript makes it extremely easy to iterate over jQuery collections using the for loop:


Simple demo using CoffeeScript with jQuery to create a button, append it after the SP ribbon and assign a click function to it.
I hope you have enjoyed the series as much as me. Please feel free to leave me any feedback through comments or email. Happy Exploring!

GitHub Link to the project: https://github.com/vman/SPCoffeeScript

Friday 27 January 2012

Working with CoffeeScript on SharePoint : ECMAScript Client Object Model

Now, the most interesting part of the series. We will be working with the ECMAScript Client Object Model through CoffeeScript.  The basic Create, Read, Update and Delete operations are done by using the ECOM with CoffeeScript:

Load the Client Object Model:


Get the Title of the Current Web:


Add Item to a List:

Update Item from List:

Delete Item from List:

Get All Items from List: In this last piece of code, notice how the while loop in CoffeeScript makes it extremely easy to iterate over a ListItemCollection.

Next:Working with CoffeeScript on SharePoint : Interacting through jQuery
GitHub Link to the project: https://github.com/vman/SPCoffeeScript

Working with CoffeeScript on SharePoint : Setup and Basics

So this new language called CoffeeScript was released recently and the only thing I could read everywhere was how its just JavaScript but only cleaner and more developer friendly. After digging a bit into it, I discovered that indeed the syntax is more friendlier and could boost productivity among JavaScript developers.

Also, being a SharePointer, whenever any new technology comes along, I always think about how it can be used in conjunction with SharePoint. How the technology can be leveraged to make SharePoint a better environment for developers as well as end-users.

So my natural instinct was to go ahead and see how CoffeeScript can be introduced in a SharePoint environment and how it can make life easier for the many SP developers out there. Lets get started then:

Project Setup:
For writing CoffeeScript, I have used the Mindscape Web WorkBench which is a very useful Visual Studio Extension. It lets you write code in CoffeeScript and then automatically produces a JavaScript file which contains the compiled code. This way you get to see your CoffeeScript code as well as the corresponding JavaScript code.

My SharePoint solution for working with CoffeeScript is very simple. I have created a Sandbox solution which contains a script module. Inside the script module, I deploy the MyScript.coffee, MyScript.js and the jQuery 1.7.1 files. I have included the script files on my pages with help of Custom Actions:
<CustomAction Location="ScriptLink" ScriptSrc="~Site/Scripts/jquery-1.7.1.min.js" Sequence="5000"/>
<CustomAction Location="ScriptLink" ScriptSrc="~Site/Scripts/MyScript.coffee" Sequence="5010" />
<CustomAction Location="ScriptLink" ScriptSrc="~Site/Scripts/MyScript.js" Sequence="5020" />

And lastly, I have included all the above elements in a Web Scoped Feature. Here is how my Solution Explorer Looks:
                                  (The GitHub link to my project is at the end of this blog post)

Now lets dive into the actual CoffeeScript code and see what exactly is up. Here are some interesting features of CoffeeScript that I felt are really nifty:

Here, I check the relative url of the current web and the use CoffeeScript's if else statement to modify it if necessary.
Optional parameters can be included in functions. Also, with the #{ } wildcard, parameters can be directly accessed from within a string.
Next: Working with CoffeeScript on SharePoint : ECMAScript Client Object Model
GitHub link to the project: https://github.com/vman/SPCoffeeScript

Saturday 21 January 2012

Reference CSS files in Sandbox Solution for SharePoint Foundation 2010


Recently I had a requirement where I had to push some custom css files to the page when my SharePoint solution package was deployed. This being a sandbox solution, I could not simply put the files in the /_layouts/ folder and reference it from there.
Also, since the solutions was targeted at a SharePoint 2010 Foundation environment, that meant that I could not use the <% $SPUrl:~sitecollection/Style Library/mystyles.css %> tag because that’s part of the publishing infrastructure which is unfortunately not allowed. If you are developing for the SharePoint Server, then you can use these tokens in sandbox solutions with help of a "hack" mentioned here:
http://msdn.microsoft.com/en-us/library/ee231594.aspx

Now, since I wanted to deploy my CSS file with the solution, I could not just go to the current MasterPage and edit it using SharePoint designer. Also, I figured that there might be times when you don’t have the access to the MasterPage and cannot edit it. So directly editing the current MasterPage was quickly ruled out.
After some thought and some digging around I found out 2 promising methods to include CSS to your Sandbox solution targeted at SharePoint foundation:
1)      Using CustomActions:
Now here is the weird thing about SharePoint 2010: They have provided a separate custom action for pushing the JavaScript to the masterpage  but they have not provided a similar method for the CSS files. So I had to improvise a little in this case. I created an empty elements file and included the following custom action inside it.


The Location=”ScriptLink” attribute tells the custom actions to include it in the ScriptLink section on the masterpage. And the ScriptBlock attribute defines what JavaScript code to be included in it. What I did is simply create a HTML link control and gave the appropriate path to of my CSS file in the href attribute.
2)      Using Feature Receiver:
Another way is by using a feature receiver which executes the defined code when a Feature is activated. Here we can use the SPWeb.AlternateCSSUrl property which can be used to give path of a CSS file which will be included in the current Web.