Showing posts with label Front end. Show all posts

Wednesday, 10 April 2019

Service Locator pattern in SPFx: Using nested scopes to work with multiple components

In the previous post, we saw how SharePoint Framework code can be decoupled by using the Service Locator pattern and Service Scopes. In short, we are able to register instances of our services on the "global" service scope and then consume those instances from any part of our code.

We can also consume instances of default services registered on the global service scope e.g. MSGraphClient, AadHttpClient, SPHttpClient etc. These registrations are done by the SharePoint Framework and all we have to do is hook into the global service scope to fetch their instances.

Now, when we register our custom service on the global service scope, all components on the SharePoint page share a single instance of the service. By components, I mean SPFx web parts and extensions. In this post, to keep things simple, I will only talk about web parts but the concepts apply to extensions as well.

When the first webpart on the page makes a call to the service scope, an instance of the custom service is created and returned. Any further calls made by the same or different webparts on the page will return the same instance of the service. Now this behaviour can be either good or bad depending on your requirements.

If you want different webparts on the page to have their own instances of the custom service, let's see how to achieve this:

Let's consider a simple custom service:

The service contains a private variable count which is initialised to 0. The increaseAndReturnCount function increases the count by 1 and then returns the value. Not the best code ever written but fits our current purpose.

Now, let's register and consume an instance of our custom service from an SPFx webpart:

If you are wondering where do we register this service as we only seem to be calling the consume function. The consume function does the registration for us by creating a default instance of the service, registering it on the service scope and then returning the same instance.

When we register our service on the global service scope returned by this.context.serviceScope, all webparts and SPFx components will share the same service instance:


Although multiple webparts are added on the page, they all share the same service instance and the same count variable keeps on increasing. OK, technically I am adding the same webpart multiple times on the page but the behaviour is the same even for different webparts calling the same service.

Now, to get around this issue, we only need to make a simple change to our code. We don't need to change any of the service code, we just need to change the way in which the service instance is created and returned:

By creating a new service scope as a child of the global service scope, we get a new service scope which is isolated to the current web part. This way, each web part will get it's own service scope to register and consume service instances.

And as a result, we get a new instance of the counter service for each web part where the counter variable is initialised to 0:


This way, we are able to create and maintain isolated service scopes per component on our page.

Hope you found this post useful!

The code is in GitHub if you want to take a look: https://github.com/vman/MultiInstanceServiceScopes

Wednesday, 27 March 2019

Service Locator pattern in SPFx: Using Service Scopes

I have written about this topic in the past but with the recent increase in SharePoint Framework adoption and with more features becoming available (e.g. MSGraphClient, AadHttpClient), I felt it would be a good time to revisit this.

With SPFx solutions getting more complex day by day and with lots of components to manage, passing the web part (or extension) context around to different parts of your code can get difficult to maintain real fast.

The problem:


For example, imagine we have created a custom service which needs the MSGraphClient to make a call to the Microsoft Graph and we are consuming this service in our SPFx webpart. To initialise the service, we need to either pass in the entire web part context to it, or explicitly pass in the MSGraphClient object from the context.

In the first case, we are unnecessarily passing in all other objects in the context to this service as well.

And in the second case, our code becomes tightly coupled i.e. in the future, if our service needs something else from the webpart context, we have to update the service as well as the consuming code (i.e. the webpart) to pass in the new dependency.

The solution:


Using the Service Locator pattern in SPFx through service scopes, we can abstract away the implementation details of our custom services from the calling code (i.e. webparts, extensions).

With service scopes, we can get hold of instances of SPFx classes like MSGraphClient, AadHttpClient, SPHttpClient and PageContext from our services without having to explicitly pass them in from the webparts.


In this post, lets see how to achieve this:

1) Calling the MSGraphClient from a custom service:


Consuming the custom service from an SPFx webpart:


If you observe the code, our calling webpart does not have any knowledge of the implementation details of the custom service, specifically the fact that it used the MSGraphClient internally to retrieve the current user details. In the future, if we wanted to change the implementation of the service, we could do it without changing any web part code.

2) Calling the AadHttpClient from a custom service:


Similarly, we can also use service scopes to get hold of an instance of the AadHttpClient class. In the code below, to keep things simple, I am using the AadHttpClient to make a call to the Microsoft Graph. Eventually, the result is the same as the previous code but it should demo how to use the AadHttpClient through service scopes.


Consuming the custom service from an SPFx webpart:


3) Calling the SPHttpClient from a custom service:


And finally, if we just want to make a call to the SharePoint REST API from our SPFx code, we can also use service scopes to get hold of an instance of the SPHttpClient class. The following code also demonstrates how to get an instance of the PageContext class to get different run time context values like the current web url. Using the current web url, we can make a call to the SharePoint REST API to get the web details:


Consuming the custom service from an SPFx webpart:


And that's it for this post! I am planning more posts on this topic in the future so keep an eye out for those :)

As always, the code from this post is available on GitHub: https://github.com/vman/ServiceScopeTestBench

Wednesday, 12 December 2018

Code Splitting in SharePoint Framework Part 2: Optimizing the SharePoint Starter Kit

I was having a look at the SharePoint Starter Kit recently and I have to say it's a very useful collection of sample SPFx webparts, extensions and other modern SharePoint building blocks. You should check it out if you haven't already.

While I was looking at the different components, I noticed something interesting: When I created a production package and observed the minified JavaScript files, the file-sizes were bigger than expected.

(Note that these are just the sizes when the files are extracted on the file system. When they are included in a package and loaded on SharePoint pages, they will be compressed so their sizes would be smaller. The image is just to help compare the file-sizes after the optimisations)


So I started having a closer look at the SPFx components and noticed a few interesting things:

1) @pnp/sp: 


As expected, many of the components were using the @pnp/sp package but each component was statically importing it. This meant that each component will have a copy of @pnp/sp in its individual bundle:

The solution was to implement code splitting and separate out @pnp/sp into it's own file:

This approach has two benefits:
  • All components share the same @pnp/sp bundle
  • The @pnp/sp code is loaded dynamically on the page only when required

2) @pnp/spfx-property-controls


The @pnp/spfx-property-controls package is great when it comes to having pre-created custom controls to use in the SPFx webpart property pane.

One thing worth noting though is that the property pane is loaded much less frequently than the webpart code itself. The property pane is used only to configure the webpart so the code is only needed then and not when the web part loads normally on the page.

To further optimize the webpart bundles, we can separate out the property pane code (including the components from the @pnp/spfx-property-controls package) and load it on the page dynamically only when the property pane is loaded.

So instead of statically importing the property pane components like this:

We could dynamically import them:

This would also mean that the property pane custom controls will be split into their own JavaScript bundles and multiple webparts using the same type of control will share the code:


This is particularly helpful with controls like `PropertyFieldCollectionData` which is more than 700kb in uncompressed format!

After implementing both these changes, we can see that the file sizes have been considerably reduced:


Also important to note is not only the filesize reduction, the main benefit of this approach is that there is no duplicate code in the components.

I have submitted a Pull Request with these changes to the SP Starter Kit GitHub repo if you want to checkout the code:
https://github.com/SharePoint/sp-starter-kit/pull/216

Here is a link if you want to checkout the official Microsoft docs on dynamic loading of packages:
https://docs.microsoft.com/en-us/sharepoint/dev/spfx/dynamic-loading

Thanks for reading!

Monday, 8 October 2018

Code Splitting in SharePoint Framework (SPFx)

Code splitting is not a new concept to TypeScript/React/Webpack developers. In short, it is a optimisation technique which allows us to split our application bundle into smaller bundles and load them on-demand only when required.

E.g. when a React component or a third party package is only needed when the user clicks on a certain button, then there is no need to load in on the first page load. It can be fetched on-demand when the button is pressed. This reduces the amount of data fetched over the wire on first page load, thus improving performance and user experience. This can be particularly helpful in large applications with many third party packages and components.

In this post let's have a look at how to do code splitting in the SharePoint Framework. As an example, I am going to use an SPFx web part created using React but the code splitting approach can be used with other frameworks/libraries as well.

We are going to have a look at two scenarios where code splitting can really help:

1) Loading a React Component on-demand (where we load the DetailsList component from Office UI Fabric)

2) Loading a third party package on-demand (where we load the infamous-for-its-large-size moment js)

So to begin with, here is my render method of a React component created by default by the SPFx yeoman generator:

I have edited it to show only 2 buttons. This component will be our "main" component which will load other components and third party packages when a user clicks on the relevant button.

Load a React Component on-demand: 


The _loadDocumentsClicked function will fire when the user clicks on the Load Documents button. The DetailsList component is defined in a file called DetailsListComponent.tsx which is in the same folder as the main component.

Once the import function fetches the DetailsList component class, we create an an instance of the class and use ReactDom to insert the component to the detailsContainer div in our main component. 

Load a third party package (moment js) on-demand:


Similarly, the _loadMomentClicked function will fire when the load moment js button is clicked. it will fetch the moment package and then assign the value of moment().calendar() to a property in the current component's state.

And here is the code in action on a modern SharePoint page:

(click to zoom)

What is also important to note is that the bundle will be loaded only if it was not loaded earlier. The import function is smart enough to determine if the bundle is already downloaded and it does not request it again.

Hope you found this useful!

As always, the code for this is available on GitHub: https://github.com/vman/SPFxCodeSplitting

Monday, 14 May 2018

SPFx: Calling back to SharePoint from an AAD secured Azure Function on behalf of a user

This post is part of a series where we explore consuming Azure AD secured Azure Functions from SharePoint Framework components. Articles in the series:

1) SharePoint Framework: Calling AAD secured Azure Function on behalf of a user
2) SharePoint Framework: Calling Microsoft Graph API from an AAD secured Azure Function on behalf of a user
3) Calling back to SharePoint from an AAD secured Azure Function on behalf of a user (this post)

In the previous post, we were successfully able to call the Microsoft Graph API from an AAD secured Azure Function and return data back to the SharePoint Framework web part.

Now in this post, lets see how we can make a call back to SharePoint on behalf of the logged in user from the Azure Function. We will only focus on the code in the Azure Function here, to fully understand the set up and auth process, I recommend you check out the previous posts in the series.


Updates to the Azure AD app registration:


In order to make a call back to SharePoint, we will need to add a Client Secret to the Azure AD app registration. Skip this step if you have already done this as part of the previous post.


We will also need to add the Office 365 SharePoint Online permissions scope to the Azure AD app registration. For this post, I am selecting the "Read and write items in all Site Collections" delegated scope. You can select the scope according to the operations you want to perform in SharePoint


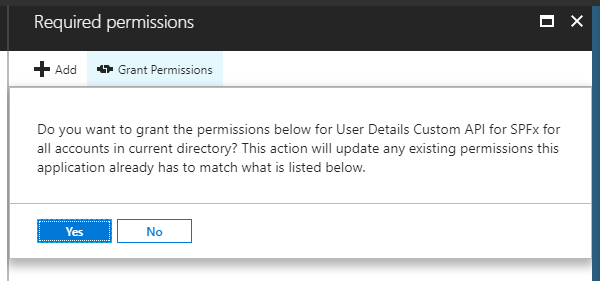
Don't forget to grant the permissions again as a subscription admin. This is so that each user does not have to do this individually:


Here is what we are going to do in the code:

When the Azure Function executes, we already have an access token sent by the SharePoint Framework AadHttpClient in the Authorization header. This access token has the "user_impersonation" scope which only allows it to access the Azure Function. It cannot be directly used to call back to SharePoint.

In order to obtain new access token that will work with SharePoint, we will have to request it using the existing access token.

Once this function is called from the SharePoint Framework, we are able to get the data back to the web part:


Thanks for reading!

Thursday, 31 August 2017

Introducing spfx-extensions-cli: A command line tool to manage SPFx extensions

I have just published a CLI tool to view and manage SharePoint Framework extensions:
https://www.npmjs.com/package/spfx-extensions-cli

More details in the package README.

Code is available on GitHub. Feel free to play around and submit any feedback:
https://github.com/vman/spfx-extensions-cli


Thursday, 27 July 2017

Simultaneously run multiple versions of the SPFx Yeoman generator with npx

This is a topic which has been discussed quite a lot since the launch of the SharePoint Framework. The SPFx Yeoman generator is recommended to be installed globally, but what if a new version is released and I want to try out the new version without uninstalling my globally installed generator? 

Waldek Mastykarz has a great post on the issue and suggests some solutions as well. Have a look at his post if you haven't already: Why you should consider installing the SharePoint Framework Yeoman generator locally

In this post, lets have a look at how we can use npx to provide a solution to this problem.

If you haven't heard about npx yet, it is the hot new member of the node ecosystem. Check out the introduction post by Kat Marchán:

In short, npx can be used to run npm packages directly from the command line without having to install them globally or locally.

From the intro post:

Calling npx <command> when <command> isn’t already in your $PATH will automatically install a package with that name from the npm registry for you, and invoke it. When it’s done, the installed package won’t be anywhere in your globals, so you won’t have to worry about pollution in the long-term.

This means that when we run the SharePoint Framework generator through npx, it will be as if it is running from a global install. After the SPFx solution is created, you will not find the generator installed either locally or globally. It has served it's purpose of generating us a solution and is no longer needed. 


Run different versions of the SPFx Yeoman generator in different folders: 


Now lets actually use npx to create two different SPFx solutions using two different versions of the SharePoint Framework Yeoman generator. We will use the latest version of the generator and the very first version of the generator which was part of SPFx Drop 1.

I am using the following command throughout the post to list the top level global packages:


I have done a global install for gulp already. This is to keep things simple as we only want to use npx for the SharePoint Framework generator. If we wanted to take things to the next level, we could use gulp through npx as well.

Now, let's go ahead and install npx globally:


After it's installed successfully, lets have a look at our global packages again:


As you can see, neither the SharePoint Framework generator, nor Yeoman itself is installed globally. This makes us free to use any version of the generator we want. Let's use the latest version, which at the time of this writing is 1.1.0

First, I am going to create a new folder named "latest" and navigate to it. Then run the following:


By specifying the -p (package) flag we run the yeoman (yo) and SPFx generator (@microsoft/generator-sharepoint) packages through npx. 

After that, we run the SharePoint Framework generator by running  -- yo @microsoft/sharepoint


Now let's run gulp serve to launch the workbench. As mentioned before, since we have already installed gulp globally, we don't have to install it again.


Now let's see the real power of npx. We will navigate to another folder and use Drop1 of the SharePoint Framework generator to create an SPFx solution.

I have created another folder called drop1. Lets navigate to it and run the following using npx:


As you have probably noticed already, the only difference in this and the previous npx command is that we are using the version numbered 0.0.65 of the generator and not the latest. This was the version of the generator when Drop 1 of the SharePoint Framework landed back in August 2016.


You will notice immediately that there are some differences in the wizard. It asks me whether to create a new folder for the solution or use the current folder. It also defaults to creating a web part and does not ask me whether I want to create an extension. This is obvious given that extensions were not part of the first drop. 

After running gulp serve, we can see the Drop 1 workbench running:


That's it! We have used two different versions of the generator to create two different solutions without having to install the generator on our machine!

Using a new version of the SPFx generator when an older version is already installed globally:


If you have been closely following the post, you know what's coming next. 

Let's say we already have a version of the generator installed globally. Now a newer version of the SPFx generator is released and we want to try it out immediately. All we have to do is use npx to run the latest version. We would be able to create a new SPFx solution with the latest generator and still keep our old generator installed globally!

The magic is described in the npx package description

If a full specifier is included, or if --package is used, npx will always use a freshly-installed, temporary version of the package. This can also be forced with the --ignore-existing flag.

This is good news because we want to have control over which generator version is used by npx to create our solution.

Here is how the process will look:


I already have the Drop 1 (0.0.65) version of the generator installed globally. Next, we are running npx and specifying it to use the latest version of the generator.

After the command is run, we are presented with the wizard which gives us the option of creation an SPFx extension. This option was not available with Drop 1 which means that the latest generator is being used to create our solution.

This is how we can use npx to explicitly specify the generator version and ignore the globally installed generator!

Where does npx store the packages?


If we navigate to our npm-cache folder, we will see that npx stores all the versions of the package in the cache. Here, we see that the @microsoft/sp-build-web package was used in both versions of the generator, hence both versions are being stored in the cache:


That's it! Hope you have enjoyed this post as much as I have enjoyed writing it :)

Thursday, 13 July 2017

Using Redux Async Actions and ImmutableJS in SharePoint Framework

I was recently working on converting my hobby project Office 365 Public CDN manager from JS, Knockout and jQuery into TypeScript, React and general ES6 code. It was a really great learning experience! If you want to see the final(-ish) code, have a look here: https://github.com/vman/SPO-CDN-Manager

While working on it, I came across libraries like Redux and ImmutableJS and how they help solve particular problems in React and the modern JS world. This really peaked my interest, so naturally, like all new things I learn, I tried to see how they could be applied to SharePoint. So in this post, lets have a look at what problems do Redux and ImmutableJS solve and how we can use them in a SharePoint Framework web part:

Source of this web part is available as a part of Microsoft's SharePoint Framework client-side web part samples & tutorials on GitHub: https://github.com/SharePoint/sp-dev-fx-webparts/tree/master/samples/react-redux-async-immutablejs


Why Redux?


I am going to assume that you are familiar with React and understand the basic concepts. If not, have a look at the tutorials on the react website, they are really great to get you started.

So as you know, the way React components work is every component displays it's UI based on the component's state. When the state is updated, the UI of the component is updated as well.

Since I was working with multiple components, I quickly realised that some events in my application would mean updating the state of more than one component. How do we make this happen? The easy (but not so great) solution was to move the state in the parent component of the two child components and then pass the state as properties to the child components. If we wanted to update the state from a child component, we would update it using a function (which is also passed as a property to the child component). When the state in the parent component was updated, it would automatically update all the child components as well.

This would quickly become tedious as more components are added to the application. The state will have to be passed down deeper and deeper in the component tree which is not really ideal.

Luckily, there is a nice solution to this problem with the introduction of Redux. With Redux, what we do is maintain the entire state of our application in a single object. This state is connected to our components and is passed as properties to them.  Any change to the state is defined with an Action which is dispatched when an event occurs.The Reducer receives the Action and updates the necessary elements of the state. (Which in turn updates the UI of the relevant component)

This is the general idea of Redux. If you want to have a deeper look and also check out some advanced concepts, there are some excellent tutorials here: http://redux.js.org/

Working of the SharePoint Framework webpart:


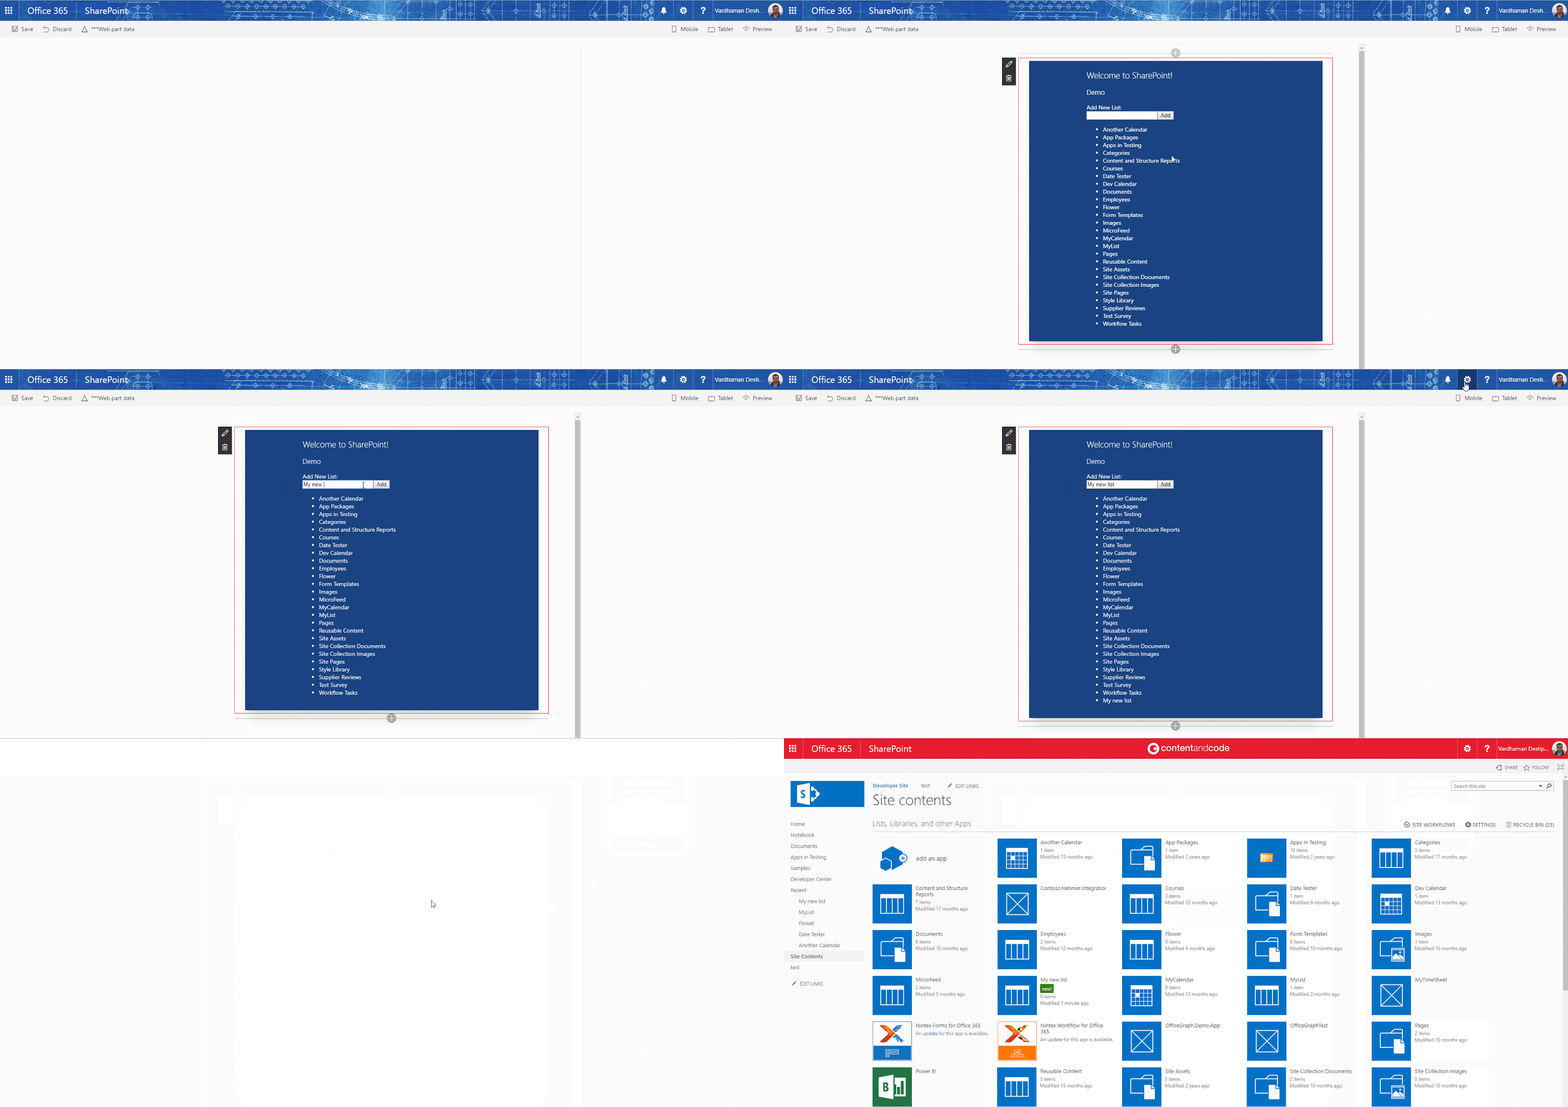
When the page loads, a redux action is fired which makes a REST API call using SPHttpClient to the current site and gets all the lists. Once the lists are fetched, another redux action is fired to instruct that all lists were successfully fetched from the server. The reducer listens for these actions and updates the state (UI) accordingly.

We can also create a new list from the webpart. When the user enters a value in the text box, an action is dispatched which updates the element in the state which represents the new list title. When the user clicks on the "Add" button, an action is dispatched which again makes an async call using SPHttpClient to create the list. Once the call is successfully returned, the UI is updated with the name of the new list.

Redux Async Actions:


Each async operation ideally has 3 actions to go along. This is not a requirement but is helpful to nicely manage our UI when the operating in being performed. We will see why we need 3 actions for one operation in the Reducers sections below. For now, all we need is a "request" action which we will fire before making the async call, a "success" action which we will fire after the aync call returns successfully and then an "error" action which will be fired if the async call returns an error.  Here are the 3 actions we will use in our webpart, and then a parent action to wrap them all together:


Reducers:


A reducer determines how the state should change after an action occurs. For example, when a "request" async action is triggered the reducer changes the application state to show a loading icon. When a request is successfully completed and it returns data from the server, the "success" action is triggered and the reducer determines that the loading icon should disappear and the data should be shown instead. Similarly, if an error would be returned from the server, the "error" action would be triggered and the reducer should show an error message on the screen instead of the loading icon. Here is our reducer code which modifies the sate using ImmutableJS. In this code, to keep things simple, we are only updating the state when the success action is dispatched. We are not showing or hiding a loading icon here.


When a reducer updates the state, a core principle of react is that we should never mutate the state object. We should always make a copy of the state, update the necessary elements in the copy and then return the copy as the new state. More details on why immutability is important here: https://facebook.github.io/react/tutorial/tutorial.html#why-immutability-is-important

ImmutableJS:


Let me begin by saying that using Immutable JS with Redux is not mandatory. We can use native ES6 features like Object.assign or the spread operator to create a new copy of the state, update the necessary elements and return the new copy. (Just remember that for supporting IE, we will need polyfills for these) If we have small to medium sized application, this is perfectly fine.

But if we are maintaining lots of elements in our state, making a new copy of state for every action can be really performance intensive.  For changing only a single element, we have to copy the entire state tree in memory, and that too for every action. Fortunately, ImmutableJS comes to the rescue here.

Using ImmutableJS, we can create a new state object in memory without duplicating the elements which are unchanged. When we create a new state object using ImmutableJS, the new object still points to the previous memory locations of unchanged elements. Only the elements which are changed are allocated new memory locations. The new copy of the state points to the same memory locations as the old copy for unchanged elements and it points to the new memory locations for the changed elements.

Here is our application state which extends the Immutable.Record class:

We have used TypeScript readonly properties in the state to mandate that these properties should never be updated directly. Instead, the custom "setter" functions should be used. In the setter functions, we use ImmutableJS methods such as "set" and "update". These functions take care of returning a new copy of the state where the only the changed elements are stored in new memory locations.

Hope you have enjoyed reading this post.

Check out the full code of the web part here: https://github.com/SharePoint/sp-dev-fx-webparts/tree/master/samples/react-redux-async-immutablejs

Friday, 28 April 2017

Error handling in SPFx when using TypeScript Async/Await

This is a quick follow up post to my previous post Using TypeScript async/await to simplify your SharePoint Framework code.

Since publishing my previous post, some folks have asked how would the error handling work when using async/await in SharePoint Framework. So decided to make this short how-to post.

At first glance, it is really straightforward, you essentially have to wrap your code in a try..catch block and the typescript compiler does the rest.

But there is something interesting here. Under the hood, SharePoint Framework uses the fetch API to make http requests. MDN has some great info on the fetch API if you haven't seen it already: https://developer.mozilla.org/en-US/docs/Web/API/Fetch_API

What would be surprising for some (including me) is that the fetch API rejects the promise only when network errors occur. A "404 Not found" is considered as valid response and the Promise is resolved.

E.g. If you make a get request to a SharePoint list which does not exist, the fetch API (and the SharePoint Framework) will actually resolve your Promise.

A fetch() promise will reject with a TypeError when a network error is encountered, although this usually means permission issues or similar — a 404 does not constitute a network error, for example. An accurate check for a successful fetch() would include checking that the promise resolved, then checking that the Response.ok property has a value of true.

https://developer.mozilla.org/en-US/docs/Web/API/Fetch_API/Using_Fetch#Checking_that_the_fetch_was_successful

There has also been some discusson on this on the SharePoint Framewok GitHub repo:
https://github.com/SharePoint/sp-dev-docs/issues/184

This is why, in addition to a try..catch block, you have to also check the Response.ok property of the returned Response. Here is the basic code you need to handle errors when using async/await:


What you can also do is, since the fetch API returns promises, you can use chaining to detect if the Response.ok property is false. Have a look at this post: Handling Failed HTTP Responses With fetch()

Update 6th May 2017: Here is a slightly more complex example where I have built a service with a custom get method which also handles errors for you:

And here is how to consume the service from your SPFx webpart:

Here is the GitHub repository for the service if you are interested:
https://github.com/vman/SPFx-Fetcher


Hope you find this useful!

Tuesday, 25 April 2017

Using TypeScript async/await to simplify your SPFx code

I recently learned about the Async/Await functionality in TypeScript and I was really surprised how easily you can simplify your code with it. Using Async/Await, you can get rid of spaghetti code as well as long chains of Promises and callbacks in your asynchronous functions.

The Async/Await functionality has been around since TypeScript 1.7 but back then it was only available for the ES6/ES2016 runtime. Since TypeScript 2.1, async/await works for ES5 and ES3 runtimes as well, which is very good news. I am kicking myself that I did not start using it sooner.

As with anything new I learn, I have tried to apply it to SharePoint as well to see how I can improve my development experience. Turns out using async/await can really make your SharePoint Framework code simpler and more readable. Lets have a look at some examples and compare between using Promises and Async/Await in your code.

Also, an important thing to note is that although I am making comparisons between using Promises and using async/await, ultimately the aync/await code is downleveled to using Promises by the typescript compiler. If the runtime does not have a native Promise object, we should make sure we have the right polyfills available.

The comparison here is more around code readability and conciseness.

All the code I am using is running inside a SharePoint Framework webpart. So, when you see the 'this' keyword in the code, it refers to my SPFx webpart which inherits from the BaseClientSideWebPart class. Since I am calling the code from inside my webpart, I have access to 'this'.

Here is my import statements for the code:


Simple example using Promises and 'then' callbacks:


Same code using async/await:


Here is a slightly more complex example with code which accepts an array of SharePoint login names and uses the batching framework to get the user profile properties of each user in the array.

You will need the IPerson interface for this:


Complex example using Promises and 'then' callbacks:


Same code using async/await:


As you can see, there is significantly less callbacks when using async/await and the code is also a lot more readable.

Hope you found this post useful. Thanks for reading!


Monday, 18 July 2016

Getting started with TypeScript, Browserify and Gulp in SharePoint

In my previous post Simple bundle, minify and upload JS to SharePoint using Gulp we saw how Gulp tasks can be used to simplify our JavaScript development experience in SharePoint. I am really impressed with Gulp as it has increased my productivity and I don't remember the last time I used SharePoint Designer :)

Now let's see how can we bring TypeScript into the mix. I have been playing around with TypeScript for a while now and here is my basic development workflow:

1) Create a main app.ts file which will contain the primary code for my application or "WebPart". In addition, app.ts will also have import references to any custom or third party modules e.g. jQuery

3) Use tslint to check the quality of my TypeScript

4) Use browserify and tsify to parse my TypeScript file and create a single JavaScript file (app.js) which includes all the dependencies required to run my app.

5) Minify my app.js using gulp-uglify and rename it to app.min.js using gulp-rename

6) Upload the debug and minified files to the Style Library in SharePoint using gulp-spsave

7) Then the JavaScript files can be used any way I like e.g. embed it using a Custom Action or in a Script Editor or a Content Editor WebPart.

Before we begin, if you are using Visual Studio 2015 like me, make sure you have the latest version of Node installed and Visual Studio is configured to use it. Here is an excellent tutorial on how to do this: How to configure Visual Studio 2015 with the latest version of Node.js and NPM

Now let us have a look at the important bits of my solution. I have uploaded the entire solution on GitHub here: https://github.com/vman/MyTypeScript

1) app.ts file:


At the top, the import statements are used to indicate that the code in this file is dependent on these modules. The first being jQuery and the second being my custom User module. Next, we simply create an object of the User class and call it's getDetails and displayDetails methods.

2) User.ts


There is a bit more going on in my User.ts class. Just like my app.ts, the first line indicates, with an import statement, that this file is dependent on the jQuery module. The getDetails function gets the AccountName, DisplayName and Email of the current user from the SharePoint REST API and stores them as properties of the current instance. The  displayDetails function logs the same properties (of the current instance) to the console.

3) package.json


Here is a list of all npm packages used in my solution. Notice the jQuery package, browserify and tsify use it to include jQuery in the final bundle as it is requested by my app.


4) gulpfile.js


And finally, here is my gulpfile.js which does all the heavy lifting:


5) Gulp tasks:


The watch-ts-upload-to-sp task looks for any changes in the .ts files (app.ts and User.ts). If any changes are noticed, it runs the upload-to-sp task.

The upload-to-sp task has dependencies chained up so that the tasks are run in the following order:

1) lint-ts to check the code quality of TypeScript
2) browserify to import all the required modules and create a single app.js bundle file
3) minify-js to create a minified file.
4) Finally, the upload-to-sp task runs to upload the app.js and app.min.js files to the Style Library.

(click to zoom)


A note on Typings:


TypeScript uses TypeScript definition '.d.ts' files to provide intellisense while writing a file. The TypeScript Definition Manager "Typings" is the current recommended approach of including definition files in your project: https://github.com/typings/typings

I have included typings as an NPM package in my solution (have a look my package.json file) and then used the following commands to get the required typings in my project:

Thanks for reading!

Monday, 23 May 2016

Minify custom SharePoint themable CSS with Gulp

The ability to create your own themable CSS has been present in SharePoint for a long time:

How to: Make custom CSS files themable in SharePoint 2013

Working with the SharePoint Theming Engine

You can even define custom names/properties in your .spcolor files which can be used in your custom CSS. My colleague Matt Holden has a great post on this here:

Custom .spcolor files for SharePoint Composed Looks

We were using this method in one of our SharePoint Online projects along with Gulp tasks to bundle and minify all our JavaScript/CSS files as per my previous post Simple bundle, minify and upload JS to SharePoint using Gulp

Now, the SharePoint theming engine uses CSS comments to determine the color replacement:

As per Matt's post, the theming engine replaces the values at run-time to the color defined in the ContentAccess1 section in the spcolor file.

For the theming engine to successfully carry out this replacement, the ReplaceColor comment needs to be present in the CSS file we load in SharePoint.

When I minified the Themable.css file using the clean-css gulp plugin, it stripped out all the comments which made the replacement not work:

Then I noticed that the clean-css plugin provides an option to keepSpecialComments when it does the minification. I tired using that but it still did not work as special comments have to start with an exclamation mark: https://github.com/jakubpawlowicz/clean-css#how-to-preserve-a-comment-block

Adding an exclamation mark before the comment was not going to work as that would be invalid syntax for the SharePoint theming engine.

So my final solution was to convert the ReplaceColor comment to a special comment before processing it through the minifier, then letting the minifier do it's thing by minifying the css file but preserving the special comments, and then after the minification, again converting the special comment to a regular comment suitable for the SharePoint theming engine:

Which then gave me the minified CSS along with the required comments preserved:

Thanks for reading!

Monday, 2 May 2016

Simple bundle, minify and upload JS to SharePoint using Gulp

I recently started playing around with Gulp and was not really impressed until I came across the gulp-spsave plugin. This plugin will let you upload your JS/CSS files directly to SharePoint right from Visual Studio 2015! This meant that I no longer had to manually upload my JS files to SharePoint or use SharePoint Designer to edit my JS/CSS files!

This got me more interested in Gulp and I started exploring how can I further improve my debugging and build workflow with Gulp. After spending some more time, I came up with a basic workflow which will definitely get you interested in Gulp as a SharePoint/Office 365 Developer!

This is a simple workflow which will look for predefined JavaScript files in your Visual Studio 2015 project. If any of your files change, it will be bundled into a single JavaScript file, minified and uploaded to SharePoint.

Here is my project on GitHub: https://github.com/vman/SP-Simple-Gulp-Demo

The plugins used in this demo are:

gulp-concat : Used to bundle js files.

gulp-uglify : Used to minify the js files

gulp-rename : Used to rename the minified file to .min.js

gulp-spsave : Used to upload files to SharePoint

Here is the file structure of my Visual Studio 2015 project. It is a simple ASP.NET project where I have removed all unnecessary files. Since this is a strictly front-end/UI project, you could also open a folder in Visual Studio as described in this StackOverflow post.


The Scripts folder contains the JS files I will be working on. For demo purposes, I have copied the files from the Core.JavaScriptCustomization project in PnP.

The Output folder is where my output files GulpDemo.js and GulpDemo.min.js will be created. These will also be uploaded to SharePoint.

The GulpFile.js is where all my Gulp tasks will be defined. 

The package.json file is where all the NPM packages required for my tasks will be defined. 

So without further ado, here is the code for my Gulp tasks:


After creating your gulp tasks, you can run them from the Task Runner Explorer window in Visual Studio 2015:


After changing the scenario1.js file, I can see that the concat, minify and upload to sp tasks are triggered as well:


Thanks for reading!