Showing posts with label Authentication. Show all posts

Monday, 14 May 2018

SPFx: Calling back to SharePoint from an AAD secured Azure Function on behalf of a user

This post is part of a series where we explore consuming Azure AD secured Azure Functions from SharePoint Framework components. Articles in the series:

1) SharePoint Framework: Calling AAD secured Azure Function on behalf of a user
2) SharePoint Framework: Calling Microsoft Graph API from an AAD secured Azure Function on behalf of a user
3) Calling back to SharePoint from an AAD secured Azure Function on behalf of a user (this post)

In the previous post, we were successfully able to call the Microsoft Graph API from an AAD secured Azure Function and return data back to the SharePoint Framework web part.

Now in this post, lets see how we can make a call back to SharePoint on behalf of the logged in user from the Azure Function. We will only focus on the code in the Azure Function here, to fully understand the set up and auth process, I recommend you check out the previous posts in the series.


Updates to the Azure AD app registration:


In order to make a call back to SharePoint, we will need to add a Client Secret to the Azure AD app registration. Skip this step if you have already done this as part of the previous post.


We will also need to add the Office 365 SharePoint Online permissions scope to the Azure AD app registration. For this post, I am selecting the "Read and write items in all Site Collections" delegated scope. You can select the scope according to the operations you want to perform in SharePoint


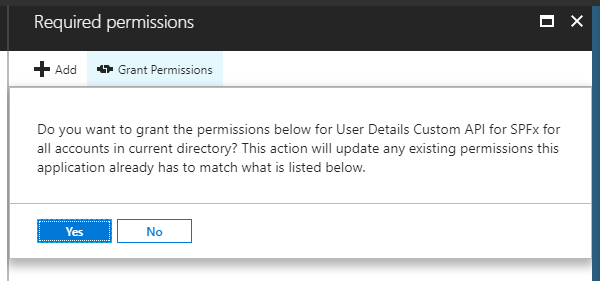
Don't forget to grant the permissions again as a subscription admin. This is so that each user does not have to do this individually:


Here is what we are going to do in the code:

When the Azure Function executes, we already have an access token sent by the SharePoint Framework AadHttpClient in the Authorization header. This access token has the "user_impersonation" scope which only allows it to access the Azure Function. It cannot be directly used to call back to SharePoint.

In order to obtain new access token that will work with SharePoint, we will have to request it using the existing access token.

Once this function is called from the SharePoint Framework, we are able to get the data back to the web part:


Thanks for reading!

SPFx: Calling Microsoft Graph API from an AAD secured Azure Function on behalf of a user

This post is part of a series where we explore consuming Azure AD secured Azure Functions from SharePoint Framework components. Articles in the series:

1) SharePoint Framework: Calling AAD secured Azure Function on behalf of a user
2) Calling Microsoft Graph API from an AAD secured Azure Function on behalf of a user (this post)
3) SharePoint Framework: Calling back to SharePoint from an AAD secured Azure Function on behalf of a user

In the previous post, we were successfully able to call an AAD secured Azure Function from a SharePoint Framework web part.

Now once we are in the Function, lets see how to make a call to the Microsoft Graph on behalf of the logged in user. We will only focus on the Azure Function here, to fully understand the set up and auth process, I recommend you check out the previous post.


Updates to the Azure AD app registration:


In order to call the Microsoft Graph, we will need to add a Client Secret to the Azure AD app registration.


We don't need to add any new permission scopes for the purposes of this post as we are going to make a call to the /v1.0/me endpoint which requires the User.Read permission. According to the SPFx docs, if we exchange the SPFx generated token for a MS Graph token, it will automatically have the User.Read.All permission scope.

If you want to do anything beyond this with the Microsoft Graph, you will need to add the relevant permissions scope and grant permissions to it. In the next post, we will see how to do this by granting permissions to the "Office 365 SharePoint Online" permissions scope.

Here is what we are going to do in this post:

When the Azure Function executes, we already have an access token sent by the SharePoint Framework AadHttpClient in the Authorization header. This access token has the "user_impersonation" scope which only allows it to access the Azure Function. It cannot be directly used to call the Microsoft Graph.

In order to obtain new access token that will work with the Microsoft Graph, we will have to request it using the existing access token. Once we have the new token, we are able to make a call to the Microsoft Graph:

Once this function is called from our SharePoint Framework web part, we are able to get data back from the graph:


Thanks for reading!

Monday, 19 February 2018

SPFx: Calling AAD secured Azure Function on behalf of a user with AadHttpClient

This post is part of a series where we explore consuming Azure AD secured Azure Functions from SharePoint Framework components. Articles in the series:

1) SharePoint Framework: Calling AAD secured Azure Function on behalf of a user (this post)
2) Calling Microsoft Graph API from an AAD secured Azure Function on behalf of a user
3) SharePoint Framework: Calling back to SharePoint from an AAD secured Azure Function on behalf of a user

Recently, after long last, the support for easily calling Azure AD secured custom APIs was released in the latest version of the SharePoint Framework (v1.6). Here are the details if you want to learn more: https://docs.microsoft.com/en-us/sharepoint/dev/spfx/use-aadhttpclient

In this post, let's have a look at how to secure our custom API (Azure Function) with Azure AD and then call the custom API from within a SharePoint Framework web part on behalf of the currently logged in user. We will be able to get the current user identity/claims in the custom API to know which user made the call to the Azure Function.


So let's quickly jump into how we are going to achieve this:

1) Create an Azure AD app registration


Go to Azure AD > App registrations > New application registration and create a new app registration. I am calling my app "User Details Custom API for SPFx"


By default the app registration will have the Sign in and read user profile scope on the Windows Azure Active Directory API. For the purpose of this post, those permissions are enough for us. We don't need to modify anything here right now.

Click on Properties and copy the App ID URI of the app registration. We will need this later in the SharePoint Framework web part.

As a subscription admin, Grant permissions to the App registration for all users so that each user does not have to do this individually:


2) Create an Azure Function App and configure it


Go to App Services > Add > Function App and create a new Azure Function App which we will use to host our Azure Function


Once the Function App is created, we need to secure it with our Azure AD app registration.

Go to Function App > Platform Features > Authentication / Authorization


In the Authentication / Authorization pane, for "Action to take when request is not authenticated" select "Log in with Azure Active Directory".

For Authentication Provider, click on Azure AD > Advanced and for Client ID, paste the Client ID (Application ID) of our Azure AD app registration we created earlier.

In Allowed Token Audiences, add the App ID URI of the app registration we copied in Step 1


Click Ok and Save the Configuration.

Go to Function App > Platform Features > CORS and add the SharePoint Online domain from which your SPFx webpart will make a call to the Azure Function.


Click on Save.

3) Create the Azure Function


Now let's actually create the Azure Function which we will deploy to the Function App as our custom API.

Using Visual Studio 2017, I have created a precompiled .NET Framework Azure Function project. As we are going to use this function as an API, I have selected an Http Triggered function:

Notice that the Authorization level for the function itself is set to Anonymous. This is because we are using Azure AD at the Function App level to secure it.

All this function does is returns the claims of the current authenticated user in JSON format.

Publish the function to the Azure Function App we created earlier.

4) Create the SharePoint Framework web part


Before going ahead with this step, make sure you have the latest version of the SharePoint Framework yeoman generator (1.6 at the time of this writing) This page should contain all the current versions of the generator, npm and node supported by the SharePoint Framework: https://docs.microsoft.com/en-us/sharepoint/dev/spfx/set-up-your-development-environment

Once you have all the latest packages, create the SPFx web part with yo @microsoft/sharepoint


To keep it simple, I am making it a tenant scoped solution with no JavaScript framework.

5) Request permissions for the SPFx web part


Once the SPFx web part solution is created, navigate to the config/package-solution.json file and add the webApiPermissionRequests property:

The resource will be the name of the Azure AD app registration we used to secure our Azure Function and the scope will be user_impersonation as we want to make a call on behalf of the current user.

As of SPFx 1.6 release, we also have to add the User.Read permission for "Windows Azure Active Directory" as reported in this issue: https://github.com/SharePoint/sp-dev-docs/issues/2473

6) Using AadHttpClient to call the custom Azure Function


Now in your SPFx webpart, include the following imports:

and the code to use the AadHttpClient to make a request to your custom Azure Function:

To display the table properly, add the following to the .scss file of your web part:


7) Installing and running the SPFx package 


Since we are going to run the SPFx solution in debug mode, we will run the commands without the --ship or --production switch. This will enable us to debug the solution locally.

Run the following commands to build and package your solution:

gulp build

gulp bundle

gulp package-solution

Start local debugging with

gulp serve --nobrowser

Now, upload the .sppkg file from the sharepoint/solution folder to the App Catalog:


Select the checkbox and Click on Deploy.

8) Granting permissions using the SPO Admin API management page


After deploying the package to the app catalog, as a SharePoint Administrator, navigate to the new SharePoint Online Admin centre and go to the API management section. You will notice the permissions we requested from the solution package can be approved from here. 

Approve the permissions before moving to the next step


9) Add web part to page


Now go to any modern page and add your web part to it. Since we have deployed a tenant scoped solution, no need to install it individually on each site.


The current user identity and claims coming through will be what we have sent from the Azure Function!

Hope this helps :) As always, the code from this post is available on GitHub: https://github.com/vman/spfx-azure-function-custom-api

Monday, 22 May 2017

Authenticating to the Microsoft Graph API in PowerShell

In this post, lets have a look at how we can authenticate to the Microsoft Graph REST API through PowerShell. There are a few examples already available online but either they refer to old endpoints or they present the user with a login prompt to enter a username and password before authentication.

A few other examples ask for a client id to be submitted with the authentication request. You can get this client id when you register a new app in Azure AD. But what if you don't want to create an app registration? You already have a username and password, so creating a new Azure AD application just for authentication seems redundant.

Fortunately, there is way to authenticate to the Microsoft Graph API without any login prompts and without the need to create an explicit Azure AD application.

To avoid using any login prompts, we will use the AuthenticationContext.AquireToken method from the Active Directory Authentication Library (ADAL).

To avoid creating a new Client Id and Azure AD application, we will use a well know Client Id reserved for PowerShell: 1950a258-227b-4e31-a9cf-717495945fc2 This is a hard coded GUID known to Azure AD already.

Here are the steps we are going to do:

1) Make sure we have the username and password of a user in Azure AD
2) Use the username, password and PowerShell client id to get an access token from ADAL.
2) Use the access token to call the Microsoft Graph REST API.

Before going ahead, make sure you have the Microsoft.IdentityModel.Clients.ActiveDirectory.dll on your machine. If you have been working with Office 365/Azure PowerShell, chances are you have this already. If not, you can get it from a number of places. You can use the Azure Resource Manager PowerShell cmdlets to get a hold of it: https://docs.microsoft.com/en-us/powershell/azure/install-azurerm-ps?view=azurermps-4.0.0 or you can use nuget to download it: https://www.nuget.org/packages/Microsoft.IdentityModel.Clients.ActiveDirectory

And here is the PowerShell script to authenticate the Microsoft Graph:


Running this script gets the current user from the /v1.0/me endpoint:


Thanks for reading!

Tuesday, 2 July 2013

Convert a SharePoint WebApplication from Classic authentication to Claims

Here is a quick Powershell script to convert a SharePoint WebApplication from Classic (Windows) Authentication to Claims Authentication. This script is tested in SharePoint 2010 only.

When working with SharePoint 2013, you will not need this in most cases as the default authentication provider is Claims.

Saturday, 12 January 2013

Authenticating .NET CSOM in SharePoint Online

The process of authenticating the .NET Client Object Model in SharePoint Online has been greatly simplified in the 2013 version. Earlier (2010), you had to go through a lot of steps for doing the exact same thing. You  had to open a web browser instance, force the user to enter the credentials in the browser and then grab that  cookie from Internet Explorer and pass it to the .NET CSOM. If you are interested, the code of the old authentication method can be found here:
http://blogs.msdn.com/b/cjohnson/archive/2011/05/03/authentication-with-sharepoint-online-and-the-client-side-object-model.aspx

Fortunately in the 2013 version, the process is a lot simplified by the introduction of the SharePointOnlineCredentials class. This class is part of the Microsoft.SharePoint.Client.dll itself so you don't have to include an extra assembly in your application. All you have to do is pass an instance of the SharePointOnlineCredentials class to the ClientContext.Credentials property. The SharePointOnlineCredentials takes in two parameters which are your Login Email for your Office 365 SharePoint site and your password in the SecureString format.

You can grab all the required SharePoint 2013 client assemblies from here:
http://www.microsoft.com/en-us/download/details.aspx?id=35585

For this particular demo, you will need to reference the Microsoft.SharePoint.Client.dll and the Microsoft.SharePoint.Client.Runtime.dll assemblies in your project.

 The code is as follows: