Showing posts with label OAuth. Show all posts

Friday, 4 October 2019

Microsoft Teams messaging extensions: User authentication, OAuth and Microsoft Graph

Microsoft Teams messaging extensions allow us to enhance teams messages with business data. We are able to fetch information (e.g. from Microsoft Graph or 3rd party APIs) based on various factors like the current user, current team or current channel and post it as part of a message using rich Adaptive cards.


This gives us a great way of creating Teams based integrations with other Line of Business (LOB) applications.

I won't go much deeper into the different possibilities with messaging extensions in this post. Instead, we will focus more on how they are built and how to authenticate the current user.

To know more about messaging extensions, have a look at the Microsoft docs:
https://docs.microsoft.com/en-us/microsoftteams/platform/concepts/messaging-extensions/messaging-extensions-overview

Teams messaging extension architecture:


The way in which the messaging extensions work is by leveraging the Microsoft Bot Framework and utilising the following moving pieces:

1) A Bot Channel Registration which is essentially the identity of the Bot/Messaging extension. We need this to get the Bot Id and also to set "Microsoft Teams" as one of the channels served by the bot.

2) An endpoint which will receive (and respond to) HTTP POST messages from teams when the messaging extension commands are invoked.

3) A Teams App Manifest which contains the JSON specifying the messaging extension properties, the Bot  Id, and the messaging endpoint.

Those are the primary building blocks of a Teams messaging extension (or even a Teams Chat Bot for that matter, but that's out of scope for this post)

To see a walk-through of building a messaging extension from scratch, check out Cameron Dwyer's post: https://camerondwyer.com/2019/09/09/how-to-create-a-microsoft-teams-messaging-extension-pop-up-dialog-with-a-custom-ui/

Fetching data from Microsoft Graph as the current user (delegated authentication)


This is how the sign in flow will look. The user will have to sign in only once into the app. After that, the token flow (including the access tokens and refresh tokens) will be handled by the Bot Framework.

The user is prompted to sign in the first time they launch the compose messaging extension. After the sign in is completed, the messaging extension is able to show "security trimmed" data from the Graph. In this case, it's the groups the current user has joined:


Now let's see how we can leverage the Microsoft Graph in our messaging extensions. Before fetching data from the Graph, we will need an Azure AD OAuth token for the current user in Teams. To get the token flow working, first we need to create and Azure AD App Registration and give it necessary permissions:


Next, we need to create and configure the Bot Channel Registration:


Next, create and configure an OAuth Connection Setting in the Bot Channel Registration. The Client Id, Client Secret and Tenant Id should come from the AAD App Registration created in the previous step.


And here is the code to include in the Bot which handles the AAD sign in flow of the user. I am using the Bot Framework v4 for this Bot:


This code will fetch you the access token needed for calling the Graph. After that you can use the Graph SDK to get the required data:


Hope this was helpful. Given the complexity of Microsoft Teams development at this time, this post wasn't as comprehensive as I wanted it to be. There are challenges to getting everything to work together including Bot Framework v4, Teams Bot Builder (preview), Adaptive Cards and Messaging extensions. Hope the story becomes much simpler in the future.

Friday, 8 May 2015

Using the Microsoft Graph (Office 365 Unified API) in ASP.NET MVC

In my previous post, I wrote about Getting started with the Office 365 Unified API. In that post, I introduced the new Office 365 Unified API and created a basic console application which used Azure AD for authentication and consumed the Office 365 Unified API. But chances are that a console application is not going to be a solution to most of your business needs. That is why, in this post we will see how the Office 365 Unified API can be used in an ASP.NET MVC application.

The complete code for this blog post is available on GitHub: https://github.com/vman/O365UnifiedAPIMVC

Full credit to Jason Johnston's article Getting Started with the Outlook Mail API and ASP.NET on which I have based my code.

The Authentication flow:


Since the Office 365 Unified API uses Azure AD for authentication, these are the basic steps to get your application authenticated:

1) Request an authorization code

2) Request an access token based on the authorization code. (when you successfully make this request, you also get back the refresh token along with the access token)

3) Make a request to the desired resource e.g. "https://graph.microsoft.com/beta/myOrganization/users" using the access token.

4) When the access token expires, use the refresh token to get a new access token instead of going through the entire authentication flow again.

See the following links for more details on the Office 365 Unified API and the Azure AD authentication flow:

Authorization Code Grant Flow

Office 365 Unified REST API authentication flow

Register your application in Azure AD:


Now let's get started on how to actually go through this process in an MVC application.

As mentioned in my previous post, the very first thing you need to do is register your application in Azure AD. Here are the steps to do that:

https://msdn.microsoft.com/office/office365/HowTo/get-started-with-office-365-unified-api#msg_register_app

I have registered a Web Application in this case and here are the permissions I have granted:


Windows Azure Active Directory:
  • Access your Organization's Directory

Office 365 unified API (preview): 
  • Read and write all users' full profiles
  • Access directory as the signed in user
  • Enable sign-in and read user profile

If the Office 365 unified API (preview) application is not available by default, click on "add application" and add it.

After you register your application, copy the ClientID and the ClientSecret in the web.config file of your MVC application.

<configuration>
  <appSettings>
    <add key="ida:ClientID" value="your client id" />
    <add key="ida:ClientSecret" value="your client secret" />
  </appSettings>
</configuration>

Now that the application is successfully registered in Azure AD, we can go ahead and write the code for the authentication flow in our MVC app.

The ASP.NET MVC Application:


The first thing you need to do now is to get the following NuGet package installed in your project:

Active Directory Authentication Library 2.14.201151115

Alright, we are finally ready to write some code now :)

In your MVC Controller, create an action called SignIn. We will use this action to redirect the application to the Azure AD Authorization Request Url:


This will take the application to the Azure AD login page where the user will have to enter his/her credentials. Once the credentials are successfully authenticated, the application will be taken to the redirectUrl mentioned in the code. This redirectUrl is a url to another Action in our MVC app. At this time, the url will also contain the Authorization code mentioned in step 1 and 2 above.

The Authorize action mentioned in the redirectUrl looks like this:


This will get the Authentication code from the request parameters. Based on the Authentication code, it will make a call to Azure AD to get the Access token. Once we get the Access token, we will store it in the session so that we can use it for multiple requests.

A production level solution will probably need a better mechanism to store the Access token. Andrew Connell has written a great article on storing the access token in a database. See the article here:

Azure AD & ASP.NET MVC - Walk-Through Implementing ADAL & OWIN

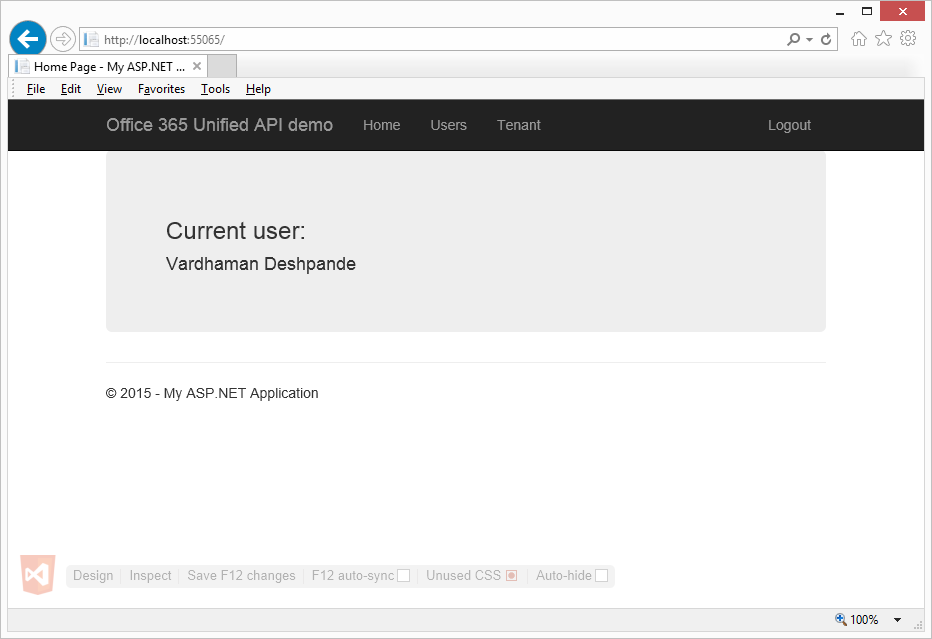
Now that we have a valid Access token, we are ready to actually make a call to the Office 365 Unified API resource to get data. I have used a simple HttpClient to make the REST call

Once the call is successful, you get JSON back which then you are free to mangle in your code.


In my sample application, I have also written calls for getting all the users from the tenant and the tenant details. Check it out here: https://github.com/vman/O365UnifiedAPIMVC

Additional Reading/Fiddling:


Here is the complete list of REST calls you can currently make using the Office 365 Unified API:

Office 365 unified API reference (preview)

Also, if you want to try out REST API without actually writing any code, this is a great tool which can help you make calls and see the response: http://graphexplorer2.azurewebsites.net/

Only thing is you will need credentials to install the application in your Azure Tenant.

Hope you found this post useful!

Tuesday, 29 January 2013

SharePoint 2013: Elevate User Access with App Only Policy

In SharePoint 2013 Apps, the authorization is handled by a 2 part mechanism. Along with the current user's permissions, the app permissions are also taken into account. User permissions and app permissions are two separate entities which dictate whether an app is allowed to perform a certain action.

When you build an app, you can specify that what all permissions are going to be required for the app to run successfully. You have to specify this in the App Manifest under the Permissions tab.

(Click Image to Zoom)


When a user installs an app, he can only grant permissions to the app up to the level which he has. So if a user has "Read" permissions on a list, he cannot grant the app "Full Control" on the same list.


There are basically 3 types of app authorizations or authorization policies in SharePoint 2013.

1) User Only Policy: In this policy, only the user permissions are taken into account. App permissions are ignored. It is checked whether the user has the permissions to perform the action and if yes, then he/she is allowed to perform the action.

2) App + User Policy: The user as well as the app permissions are taken into account. This is an AND operation. If both the user and the app have the permission to perform the action,only then the action is allowed.

3) App Only Policy: Only the permissions granted to the app are taken into account. User permissions are ignored. So even if the current user accessing the app does not have appropriate permission, the action is allowed provided the app has the permission to do so.

The App Only policy works by using a separate OAuth token which runs under the user "SHAREPOINT/App" much like SPSecurity.RunWithElevatedPriviledges() runs under the "SHAREPOINT\System" user (app pool account) in the Server Object Model.

Since OAuth is required to generate the app token, the App-Only policy can only be used in the Auto-hosted and Provider-Hosted apps. SharePoint-Hosted apps cannot use the app only policy.


To enable the App Only policy in your app, you have to add the "AllowAppOnlyPolicy" attribute to your "AppPermissions" element in the App Manifest:


Note: Although you can add this attribute to the App Manifest of the SharePoint-Hosted apps, it will be ignored as the App Only policy is not supported in SharePoint hosted apps.


Enough chit chat, lets see how we can actually utilize the App Only policy to elevate user permissions. I have written the following code in the code behind of the Default.aspx of an Auto-Hosted App:


As you can see, the ClientContext which is opened with the appOnlyAccessToken will run with the identity of the SHAREPOINT\App account. This is a very good practice to remember even when using RunWithElevatedPreviledges in the Server Object Model. You can switch on/switch off database calls with app only token. This means that if you need to make only one operation with the elevated token, then you can do that and get back to using the current user's token in one action.