Showing posts with label React. Show all posts

Wednesday, 23 November 2022

Building a custom Microsoft Teams tab: Show a native loading indicator

When building a custom Microsoft Teams tab with Teams manifest v1.7+, there is an option to natively show a loading indicator in Teams before our app loads. This can be helpful if your app needs to fetch any data before the first load.

There are two parts to showing the loading indicator: 

1. The showLoadingIndicator property in the Teams manifest needs to be set to true.
2. When the tab loads, the app.initialize() and app.notifySuccess() methods of the Teams JS SDK v2 should be called to indicate to Teams that the app is ready to load and to hide the loading indicator.

Now there are some "interesting" things to know about this. If you are using the Teams Developer Portal to configure your Teams app, then as of now the showLoadingIndicator property is set to true by default and there is no way to change this in the portal. You will have to download the app manifest and make the necessary changes in the json manually.

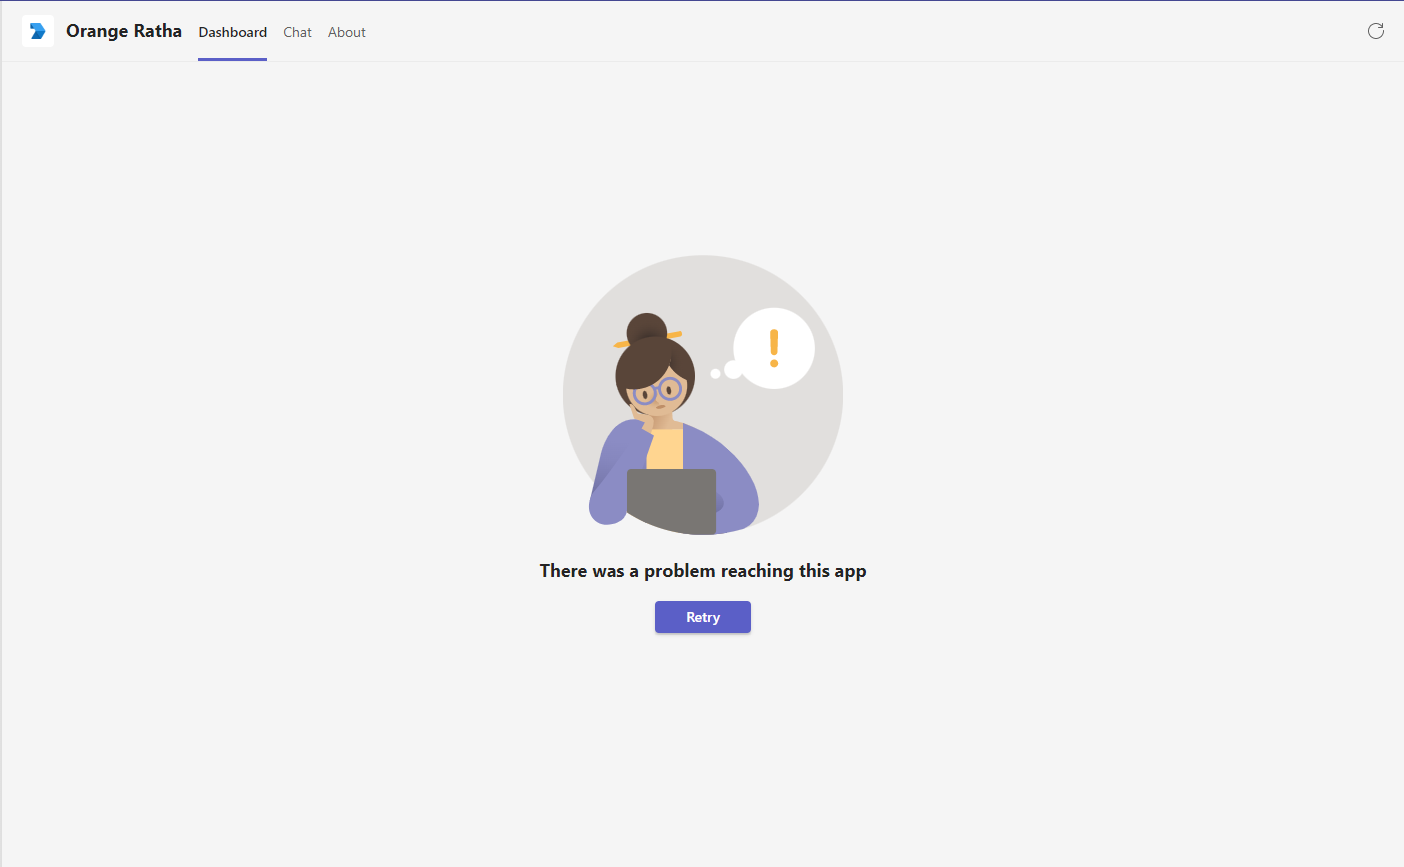
If you are just starting with Microsoft Teams development and are unaware of the loading indicator option, the error message shown on the tab is not much help in figuring out the issue. It simply says:

"There was a problem reaching the app"


This is because the showLoadingIndicator property has been set to true by the Teams Developer portal and we don't yet have our tab calling the app.initialize() and app.notifySuccess() methods of the SDK. So, Teams thinks that our app has failed to load and shows the error message.

There are two possible solutions to fixing this problem:

1. Set the showLoadingIndicator property to false manually in the manifest json. But the drawback to this approach then, is that no native loading indicator would be shown, and the users might have to stare at a blank screen until the content loads.

2. Let the showLoadingIndicator property be set to true and then make sure we call the app.initialize() and app.notifySuccess() methods of the SDK.

Manifest.json:


Tab react code:


There are further options possible with the loading indicator like hiding the loading indicator even if the app continues to load in the background and explicitly specifying loading failure. To see more details about those, the Microsoft docs are a good place to start: Create a content page - Teams | Microsoft Learn

Hope this helps!

Monday, 1 November 2021

Working with MSAL and multiple Azure AD accounts in a React SPA

I came across an interesting scenario recently: I was working with a React SPA which used Azure AD for authenticating users, and it needed to work with multiple accounts logged in simultaneously. Specifically, we were building an Azure AD multi tenant application which needed to login to multiple M365 and Azure tenants and allow the user to manage all tenants at the same time.

The good thing was that MSAL v2 does support working with multiple accounts at the same time. So in this post, let's see how we are able to do that in a React SPA with MSAL js.

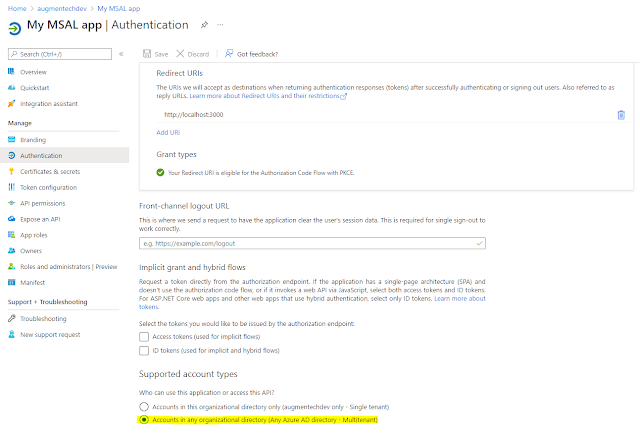
Before looking at the code, we would need to create a multi tenant Azure AD app which would be used to sign in to the different tenants. Step by step instructions can be found here: https://docs.microsoft.com/en-us/azure/active-directory/develop/tutorial-v2-javascript-spa#register-your-application


Once this is in place, we can start looking at the code itself. I have take the MSAL React tutorial as the starting point for this code and modified it to work with multiple accounts. If you want to build it from scratch, this would be a good starting point: https://docs.microsoft.com/en-us/azure/active-directory/develop/tutorial-v2-react

The very first thing we would need is to setup the configuration for our app: 
You will notice the authority is set to the /organizations end point. This is because our app is a multi-tenant app which would be used to login to different tenants.

With the config, we will now initiate a PublicClientApplication in the index.tsx file:

Now lets get to the most important App.tsx file: 

There are multiple things happening here. Let's unpack them one by one. 

First, we are using the MSAL react useMsalAuthentication hook to setup the authentication and get the login method which we will use later.

What is also important is the prompt: 'select_account' property in the request which would help us login with a new account when we are already signed in with one account.

The AuthenticatedTemplate and UnauthenticatedTemplate MSAL react components help us display different views when at least one user is logged in or no user is logged in respectively.

Next, lets look at the ProfileContent.tsx component:

Based on the homeId of passed in to this component as a property, we are using the PublicClientApplication.acquireTokenSilent method to first get the access token of the relevant user. 

Once the accessToken is fetched, we are making a call to the Microsoft Graph to get the basic details of the user. We are using the callMsGraph function for this.

The ProfileData component takes in all properties fetched from the graph and displays it.

The handleLogout function uses the PublicClientApplication.logoutRedirect function to log out the specific user.

So after everything is in place, we would be able to work with multiple users logged in simultaneously at the same time.

Hope this helps! 

As always, the code for this post can be found on GitHub: https://github.com/vman/ts-msal-react-tutorial

Tuesday, 26 May 2020

Create a custom React hook to mimic class component's setState behaviour

I have been playing around with react hooks recently, and slowly wrapping my head around how they work. Hooks are a great way to create reusable functionality, but there are some instances where I think class components fared better. Let's talk about one such scenario, and also how to get around it when using hooks.


When working with react state in a class component, if we wanted to update a specific property on the state object, all we had to do was call the setState method and pass in an object containing only the updated property and value. The resultant state would be the previous state merged with the new property value.

It works a bit differently with hooks. When using the default useState hook, the new object passed in entirely replaces the previous state. So all the properties in the previous state are overwritten. So every time you want to update a state object, the onus is on the developer to keep track of the previous state and update the new state based on that. Here is how this behaviour manifests in code:

As you can see in the code the value of the FirstName property is lost when we update the LastName property. 

There is a way to set the state based on previous state by using the functional update pattern: https://reactjs.org/docs/hooks-reference.html#functional-updates

But that means that every time we used to just use this.setState in class components, we now have to use

setState(prevState => {
  return {...prevState, ...updatedValues};
});

This would be additional overhead for us devs which I wanted to check if we could avoid.

Fortunately with the reusable nature of hooks, we can simply create a custom hook which mimics the class components setState behaviour and merges the new state with the previous state. And we can use this custom hook any time we want to merge the state.

Here is how the previous code would look when using our custom hook:


The only change in code is that we have replaced react's useState with our custom useCustomState. This gives us back the ability to merge state objects instead of replacing them. (I have also changed the variable names from state and setState to customState and setCustomState respectively to make it explicit that we are using the custom hook. But you can just as well keep using the state and setState names)

So how does our custom hook work? It's built as a wrapper on top of the useState hook's functional update pattern. Any time a state object is passed to the setCustomState function, it internally uses the functional update pattern and merges the new state with the previous state. Let's have a look at the code:


This automates the overhead of using the functional pattern. It is no longer the the developers responsibility, and instead, is done by the custom hook.

But wait, what if there is a scenario where a new state depends on the previous state? Our custom hook does not yet expose a way for the developer to update the state based on the previous state. Let's fix that. We can update our hook to add a method which accepts a function. This function will receive the previous state from react.  

And consuming the new hook can be done by passing in a function updater: 

Hope that helps! For the sake of completeness here is the full code for our custom hook:

Full solution including the custom hook and the consuming code can be found here: https://github.com/vman/spfx-react-hooks-customstate

This post generated some good discussion on twitter with Yannick Plenevaux regarding the ideal cases when to use this approach as opposed to other approaches of state management like using the useState or useReducer hooks. Have a look here: https://twitter.com/yp_code/status/1265244244077416448 

Monday, 27 April 2020

SPFx Teams tab: Use react hooks to dynamically handle theme changes

When developing a custom Teams tab with the SharePoint Framework, we want to make sure that the SPFx custom tab (web part) is styled according to the current selected theme.

Also, if the user switches the theme (e.g. from default to dark), we want to make sure that the styling of our SPFx web part also changes without the user having to reload the tab.


Let's see how we can do this. In this post, depending on the Teams theme, we will dynamically add a CSS class to our top level react component. And when the theme changes, we will change this class as well. That will be the scope of this post without going into further details of Styling/CSS.

Also, since I have been exploring React hooks recently, we will be using them in the demo code.

The very first thing we need to do is to make sure that our SPFx tab loads with the currently selected theme when the tab loads for the first time.. This can be achieved with the teamsJS sdk bundled with SPFx:

The theme property will either have the values "default", "dark" or "contrast" (at the time of writing this post). Depending on this property, we can add a CSS class to the top level container of our web part.

Now the important part. When the user updates the theme, we want to fire an event which can be used to set the new theme in our tab. Luckily the teamsJS sdk provides us with a function which can be used to register this event handler:

https://docs.microsoft.com/en-us/microsoftteams/platform/tabs/how-to/access-teams-context#theme-change-handling

With this, we are able to capture the theme update dynamically and update our component state. Next, we also want to change the CSS class of the top container when the theme changes. We will do this by using the useEffect hook again and setting the class depending on the selected theme.

This hook takes in the themeState as a dependency which means that it will run anytime themeState changes. We will use it to update the styleState.

I could have been a bit more clever here and simply updated the class in the registerOnThemeChangeHandler function itself. But I wanted to keep the themeState and styleState separate to have them loosely coupled and also to play around with hooks a bit more ;)

Here is the complete code for the React Functional component:

Hope you found the post useful! As always, the code for this post is available on GitHub: https://github.com/vman/spfx-teams-theme-hooks

Wednesday, 5 February 2020

SPFx: Using React hooks to globally share service scope between components

In my previous posts, I have written quite a few times about SharePoint Framework service scopes (I will add links at the end of the article). In short, Service Scopes are the SPFx implementation of the Service Locator pattern i.e. a single shared "dictionary" where services (either oob SPFx or custom) are registered and can be consumed from any component in the application.

For example, without using service scopes, if we wanted to make a call to the Microsoft Graph (using MSGraphClient) from within a deeply nested react component, either we would have to pass in the SPFx context down all the components in the tree, or maybe a create a custom service which returns the web part context, and then call that service from within our nested component. Or maybe use redux to globally maintain the context in a single state object.

But with all these approaches (there may be more), testing the components would be difficult as they would have a dependency on the SPFx context which is hard to mock. Waldek Mastykarz has a great post on this.

Also, from a maintenance point of view, it could get tricky as almost all our components would start to depend on the entire context and we could easily loose track of which specific service from the context is needed by the component.

Now with my previous posts on service scopes, even though we were removing the dependency on the SPFx context, one issue still remained that the SPFx service scope was still needed to be passed into the component. We were just replacing the SPFx context with the SPFx service scopes. While this was good from a testing point of view, it wasn't great for maintainability.

Fortunately, in the recent versions of SPFx, React 16.8+ was supported which means that we can take advantage of React hooks. Specifically, the useContext hook. This gives us a very straightforward way to store the SPFx service scope in the global react context (which is different to the SPFx context) and then consume it from any component in our application no matter how deeply nested it is.

Let's see how to achieve this. In these code samples, I am using SPFx v1.10 which is the latest version at the time of writing.

1) The Application Context object


First, we need to create the React application context object which will be used to store and consume the service scope. For now I am only storing the serviceScope in the context. Other values can be stored here as well.


2) React Higher Order Component (HOC)


React hooks can only be used from functional components and not classes. With the SPFx generator creating classes by default and hooks being fairly new, I am sure there is a lot of code out there already which use classes and not functional components. Changing all code to use functional components instead of classes is a non-starter.

Fortunately, there is a way to use react hooks with classes by creating a Higher Order Component (HOC) which is a functional component. We can wrap all our class components with this HOC and safely consume the useContext hook from within this component.

(Update: If you are interested in going down the "full hooks" approach and doing away entirely with classes, Garry Trinder has got you covered. He has created a fork which only uses functional components and hooks so we don't need the HOC. If you want to take this approach, check out the code here: https://github.com/garrytrinder/spfx-servicescopes-hooks)


3) SPFx web part 


Next, we update our SPFx webpart to only pass in the serviceScope once to our top level component:


4) Top level React component 


Our top level component will need to be wrapped with the AppContext so that any nested component will be able to consume it. This just needs to be done once on the top level react component. You will notice that the HelloUser child component does not need any props passed in.


5) Child component  


Due to the Higher Order component and the useContext hook, we are able to access the serviceScope property from withing the child component. We can grab the MSGraphClient from the serviceScope and start making calls to the Graph:

And that's it! This way, we can use the React useContext hook to globally share our SPFx service scope.

Hopefully you have found this post helpful! All code is added in the GitHub repo here: https://github.com/vman/spfx-servicescopes-hooks


Also, if you are interested, here are all my previous articles on SPFx service scopes:

SharePoint Framework: Org Chart web part using Office UI Fabric, React, OData batching and Service scopes

Getting the current context (SPHttpClient, PageContext) in a SharePoint Framework Service

Service Locator pattern in SPFx: Using Service Scopes

Service Locator pattern in SPFx: Using nested scopes to work with multiple components

Monday, 2 September 2019

Create SPFx Library components containing Office UI Fabric React

When using Office UI Fabric React (OUIFR) components in SPFx projects, if you analyse the bundle structure you will notice that OUIFR components take up a lot of space which leads to increased bundle size.

If there are multiple SPFx components loaded on the page which depend on OUIFR components, the size of each bundle will be affected, as by default the OUIFR components are included in each SPFx bundle.

One way to mitigate this issue is to include all your custom components (which depend on OUIFR) into an SPFx library component and then consume the library component from SPFx webparts and extensions. This will make sure that if you have reusable custom components, they won't be loaded multiple times on the page if multiple SPFx webparts (or extensions) are consuming them.

Let's see how to achieve this. We will be working with SPFx 1.9.1 which contains the GA version of Library Components:

1) Create SPFx Library and Consumer component structure


First, make sure you have an SPFx library project as well as a "consumer" SPFx project containing webparts (or extensions). Instructions on how to create this are in the Microsoft docs: https://docs.microsoft.com/en-us/sharepoint/dev/spfx/library-component-tutorial

The code for this post is also available on GitHub if you want to have a look: https://github.com/vman/spfx-lib-components-ouifr


2) Create a new custom react component which internally uses Office UI Fabric React


In the library component project, create a new react component in a new file e.g. ButtonComponent.tsx


Here are the contents of the custom react component:


3) Update the index.ts file


In the index.ts file of the library component, include the new component to be exported:


4) Update config.json


Next, in the config/config.json file of the library component, make sure that the entry point is pointing to /lib/index.js


This step was not necessary in SPFx 1.8.2-plusbeta but seems there is a bug in SPFx 1.9.1. I have created a GitHub issue here:

5) Update the consumer web part


Make sure that the library component is referenced in the consumer webpart e.g. through npm link or by using a monorepo manager like rush or lerna.

More details on using npm link in this in the Microsoft docs: https://docs.microsoft.com/en-us/sharepoint/dev/spfx/library-component-tutorial

And finally, in your consumer SPFx react webpart, you can reference the custom component:


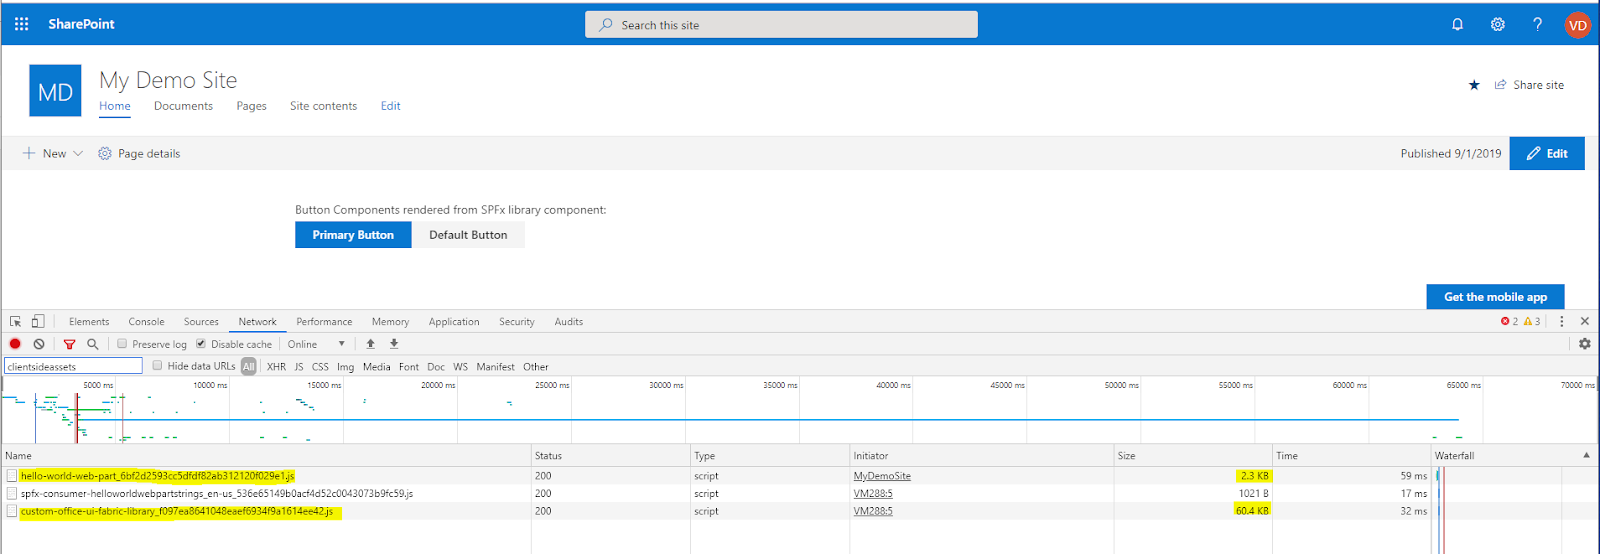
When you deploy both the SPFx packages in the app catalog and then add them on a page, you will see different bits of code being loaded separately:


And that's it! Sample repo on GitHub: https://github.com/vman/spfx-lib-components-ouifr

Monday, 8 October 2018

Code Splitting in SharePoint Framework (SPFx)

Code splitting is not a new concept to TypeScript/React/Webpack developers. In short, it is a optimisation technique which allows us to split our application bundle into smaller bundles and load them on-demand only when required.

E.g. when a React component or a third party package is only needed when the user clicks on a certain button, then there is no need to load in on the first page load. It can be fetched on-demand when the button is pressed. This reduces the amount of data fetched over the wire on first page load, thus improving performance and user experience. This can be particularly helpful in large applications with many third party packages and components.

In this post let's have a look at how to do code splitting in the SharePoint Framework. As an example, I am going to use an SPFx web part created using React but the code splitting approach can be used with other frameworks/libraries as well.

We are going to have a look at two scenarios where code splitting can really help:

1) Loading a React Component on-demand (where we load the DetailsList component from Office UI Fabric)

2) Loading a third party package on-demand (where we load the infamous-for-its-large-size moment js)

So to begin with, here is my render method of a React component created by default by the SPFx yeoman generator:

I have edited it to show only 2 buttons. This component will be our "main" component which will load other components and third party packages when a user clicks on the relevant button.

Load a React Component on-demand: 


The _loadDocumentsClicked function will fire when the user clicks on the Load Documents button. The DetailsList component is defined in a file called DetailsListComponent.tsx which is in the same folder as the main component.

Once the import function fetches the DetailsList component class, we create an an instance of the class and use ReactDom to insert the component to the detailsContainer div in our main component. 

Load a third party package (moment js) on-demand:


Similarly, the _loadMomentClicked function will fire when the load moment js button is clicked. it will fetch the moment package and then assign the value of moment().calendar() to a property in the current component's state.

And here is the code in action on a modern SharePoint page:

(click to zoom)

What is also important to note is that the bundle will be loaded only if it was not loaded earlier. The import function is smart enough to determine if the bundle is already downloaded and it does not request it again.

Hope you found this useful!

As always, the code for this is available on GitHub: https://github.com/vman/SPFxCodeSplitting

Thursday, 13 July 2017

Using Redux Async Actions and ImmutableJS in SharePoint Framework

I was recently working on converting my hobby project Office 365 Public CDN manager from JS, Knockout and jQuery into TypeScript, React and general ES6 code. It was a really great learning experience! If you want to see the final(-ish) code, have a look here: https://github.com/vman/SPO-CDN-Manager

While working on it, I came across libraries like Redux and ImmutableJS and how they help solve particular problems in React and the modern JS world. This really peaked my interest, so naturally, like all new things I learn, I tried to see how they could be applied to SharePoint. So in this post, lets have a look at what problems do Redux and ImmutableJS solve and how we can use them in a SharePoint Framework web part:

Source of this web part is available as a part of Microsoft's SharePoint Framework client-side web part samples & tutorials on GitHub: https://github.com/SharePoint/sp-dev-fx-webparts/tree/master/samples/react-redux-async-immutablejs


Why Redux?


I am going to assume that you are familiar with React and understand the basic concepts. If not, have a look at the tutorials on the react website, they are really great to get you started.

So as you know, the way React components work is every component displays it's UI based on the component's state. When the state is updated, the UI of the component is updated as well.

Since I was working with multiple components, I quickly realised that some events in my application would mean updating the state of more than one component. How do we make this happen? The easy (but not so great) solution was to move the state in the parent component of the two child components and then pass the state as properties to the child components. If we wanted to update the state from a child component, we would update it using a function (which is also passed as a property to the child component). When the state in the parent component was updated, it would automatically update all the child components as well.

This would quickly become tedious as more components are added to the application. The state will have to be passed down deeper and deeper in the component tree which is not really ideal.

Luckily, there is a nice solution to this problem with the introduction of Redux. With Redux, what we do is maintain the entire state of our application in a single object. This state is connected to our components and is passed as properties to them.  Any change to the state is defined with an Action which is dispatched when an event occurs.The Reducer receives the Action and updates the necessary elements of the state. (Which in turn updates the UI of the relevant component)

This is the general idea of Redux. If you want to have a deeper look and also check out some advanced concepts, there are some excellent tutorials here: http://redux.js.org/

Working of the SharePoint Framework webpart:


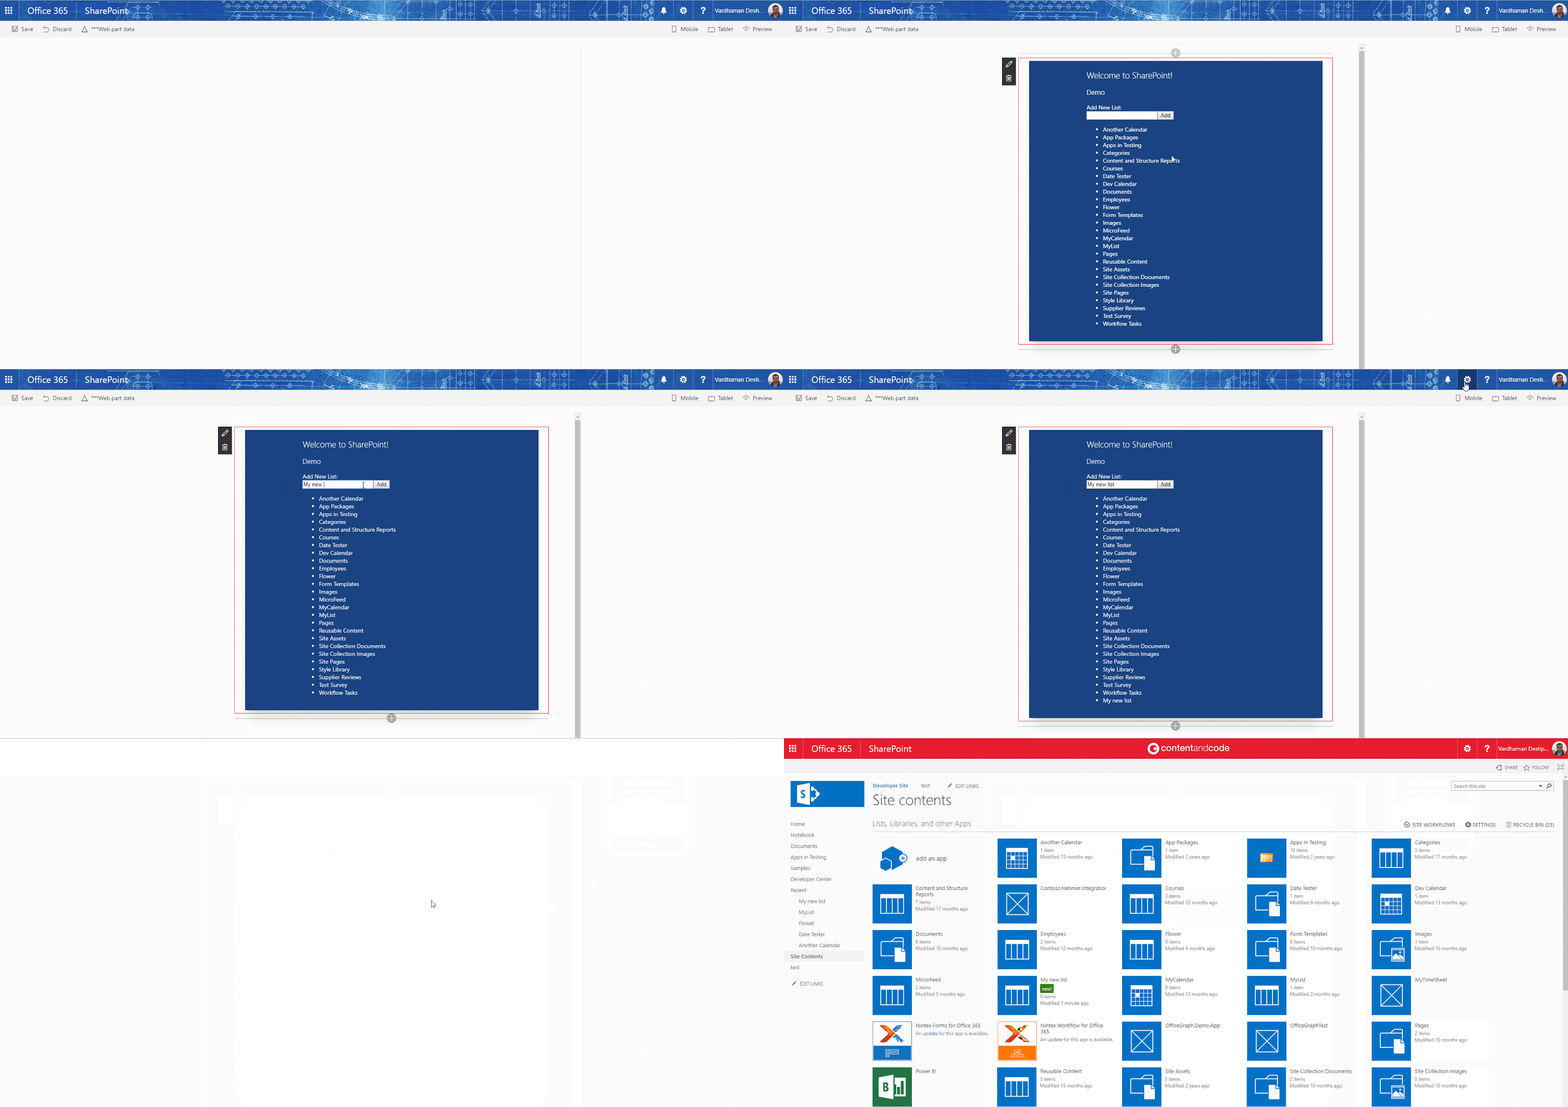
When the page loads, a redux action is fired which makes a REST API call using SPHttpClient to the current site and gets all the lists. Once the lists are fetched, another redux action is fired to instruct that all lists were successfully fetched from the server. The reducer listens for these actions and updates the state (UI) accordingly.

We can also create a new list from the webpart. When the user enters a value in the text box, an action is dispatched which updates the element in the state which represents the new list title. When the user clicks on the "Add" button, an action is dispatched which again makes an async call using SPHttpClient to create the list. Once the call is successfully returned, the UI is updated with the name of the new list.

Redux Async Actions:


Each async operation ideally has 3 actions to go along. This is not a requirement but is helpful to nicely manage our UI when the operating in being performed. We will see why we need 3 actions for one operation in the Reducers sections below. For now, all we need is a "request" action which we will fire before making the async call, a "success" action which we will fire after the aync call returns successfully and then an "error" action which will be fired if the async call returns an error.  Here are the 3 actions we will use in our webpart, and then a parent action to wrap them all together:


Reducers:


A reducer determines how the state should change after an action occurs. For example, when a "request" async action is triggered the reducer changes the application state to show a loading icon. When a request is successfully completed and it returns data from the server, the "success" action is triggered and the reducer determines that the loading icon should disappear and the data should be shown instead. Similarly, if an error would be returned from the server, the "error" action would be triggered and the reducer should show an error message on the screen instead of the loading icon. Here is our reducer code which modifies the sate using ImmutableJS. In this code, to keep things simple, we are only updating the state when the success action is dispatched. We are not showing or hiding a loading icon here.


When a reducer updates the state, a core principle of react is that we should never mutate the state object. We should always make a copy of the state, update the necessary elements in the copy and then return the copy as the new state. More details on why immutability is important here: https://facebook.github.io/react/tutorial/tutorial.html#why-immutability-is-important

ImmutableJS:


Let me begin by saying that using Immutable JS with Redux is not mandatory. We can use native ES6 features like Object.assign or the spread operator to create a new copy of the state, update the necessary elements and return the new copy. (Just remember that for supporting IE, we will need polyfills for these) If we have small to medium sized application, this is perfectly fine.

But if we are maintaining lots of elements in our state, making a new copy of state for every action can be really performance intensive.  For changing only a single element, we have to copy the entire state tree in memory, and that too for every action. Fortunately, ImmutableJS comes to the rescue here.

Using ImmutableJS, we can create a new state object in memory without duplicating the elements which are unchanged. When we create a new state object using ImmutableJS, the new object still points to the previous memory locations of unchanged elements. Only the elements which are changed are allocated new memory locations. The new copy of the state points to the same memory locations as the old copy for unchanged elements and it points to the new memory locations for the changed elements.

Here is our application state which extends the Immutable.Record class:

We have used TypeScript readonly properties in the state to mandate that these properties should never be updated directly. Instead, the custom "setter" functions should be used. In the setter functions, we use ImmutableJS methods such as "set" and "update". These functions take care of returning a new copy of the state where the only the changed elements are stored in new memory locations.

Hope you have enjoyed reading this post.

Check out the full code of the web part here: https://github.com/SharePoint/sp-dev-fx-webparts/tree/master/samples/react-redux-async-immutablejs

Tuesday, 13 September 2016

SharePoint Framework: Org Chart web part using Office UI Fabric, React, OData batching and Service scopes

Here is a SharePoint Framework web part I have put together to show an organisation chart for the current user: 

Code is available on GitHub as part of the SharePoint Framework client-side web part samples & tutorials: https://github.com/SharePoint/sp-dev-fx-webparts/tree/master/samples/react-organisationchart


(click to zoom)

1) For getting the Manager and the Reports of the current user, the ExtendedManagers and DirectReports user profile properties are used.


2) Uses the OrgChart CSS directly from the Office UI Fabric: http://dev.office.com/fabric/OrgChart (Not the Office UI Fabric React components which are still in progress)


The Office UI Fabric CSS is bundled together with the web part and not referenced externally. In the OrganisationChart.module.scss:

Thanks to my colleague and buddy Paul Ryan for this tip.

3) The REST API calls are made with the HttpClient belonging to the current ServiceScope. No need to pass web part properties or the web part context. 


4) The Managers and DirectReports are fetched by registering a mapping of the UserProfileService class in the current ServiceScope


5) OData Batching is used to get details (Photos, Titles, Profile Urls) of all DirectReports in a single call. (Similarly, if more than one Manager exists in the ExtentedManagers property, details of all users are fetched in a single batch call)


More on OData Batching in my previous post: Batch REST requests in SPFx using the ODataBatch preview

Hope you find this useful!